Origami Kappa Face
The kappa is one of Japan's most beloved little monsters — a green, water-loving sprite with a mischievous grin — and this origami version gives you its face in just a few folds. It is the kind of quick, cheerful build that is perfect for a rainy afternoon with kids.
There is nothing scary here: mostly creases, a few corners to the center, and a couple of behind-the-paper tucks. The final step is the best part — you stick on two eyes and suddenly your flat square has a personality. Grab a sheet with a colored side and let's meet the kappa.
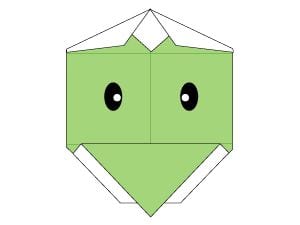
Learn how to fold an easy origami kappa face. You will need a square piece of paper — ideally colored on one side. Follow the tutorial step by step; it is easy to do and very suitable for beginners and kids. Let’s get started.
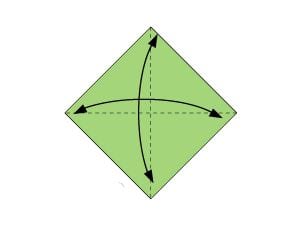
STEP 1.
Fold in half twice to make creases, then fold back.
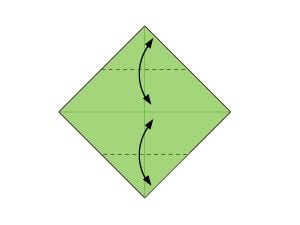
STEP 2.
Make creases by folding both the top and bottom corners to the center point.
STEP 3.
Fold the top corner to the center point of the crease made in STEP 2.
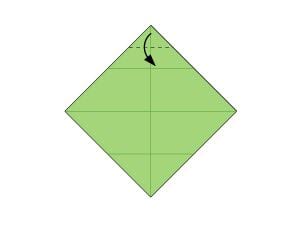
STEP 4.
Fold both top corners down along the dotted line as shown. Fold the bottom corner up along the dotted line.
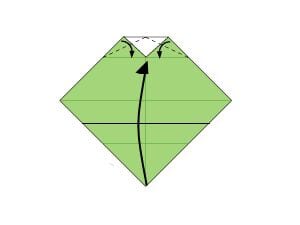
STEP 5.
Fold the top corner of the upper layer down through the center point of the bottom edge.
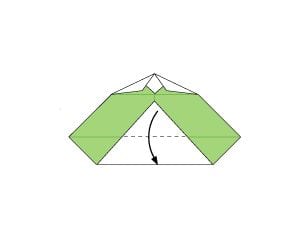
STEP 6.
Fold both the left and right corners behind to the center line.
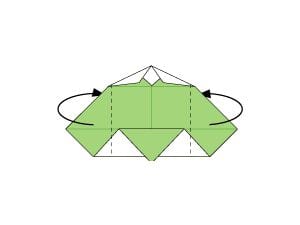
STEP 7.
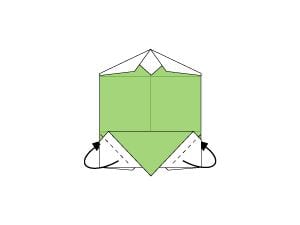
Fold both corners of the bottom edge behind along the dotted line.
STEP 8.
Stick on the eyes, and your kappa face is finished.