
Origami Card Case
Loose cards have a way of ending up everywhere except where you need them. Here is a five-minute fix: one sheet of paper, sixteen easy folds, and you have a slim case that actually holds them.
The clever bit is the pair of little pockets you form partway through - once the sides are flattened, cards slide in and stay put. Use it for credit cards, keep your business cards looking sharp, or fold one from pretty paper to turn a gift card into something worth giving.
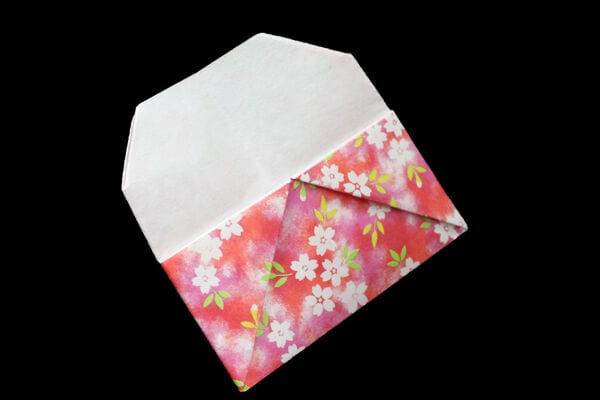
If you are in need of a place to put all your credit cards, or to keep all of your business cards safe, this quick and easy origami project is for you. It also works beautifully as a practical business card case or a gift card holder.

STEP 1.
Fold and crease the paper in the direction of the arrow.

STEP 2.
Fold the paper along the dotted line in the direction of the arrow.

STEP 3.
Fold the paper along the dotted line in the direction of the arrow.
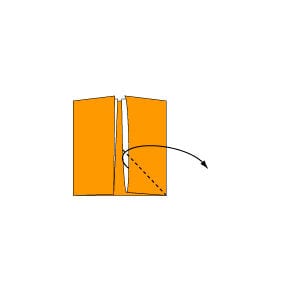
STEP 4.
Open the paper out as shown to form a small pocket, then flatten the sides of the pocket.

STEP 5.
Open the paper out as shown to form a small pocket, then flatten the sides of the pocket.
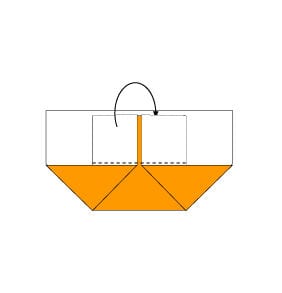
STEP 6.
Fold the paper so that the dotted line sits on the inside.

STEP 7.
Turn the paper over.

STEP 8.
Fold the paper along the dotted line in the direction of the arrow.

STEP 9.
Fold the paper along the dotted line in the direction of the arrow.
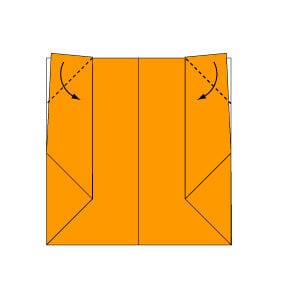
STEP 10.
Fold the paper along the dotted line in the direction of the arrow.
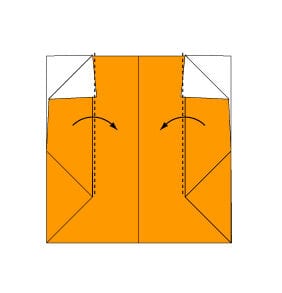
STEP 11.
Open the paper out in the direction of the arrow.
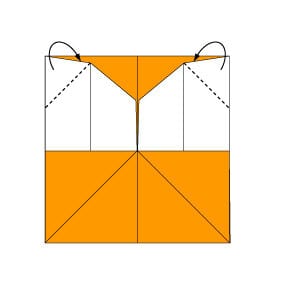
STEP 12.
Fold the paper so that the dotted line sits on the inside.
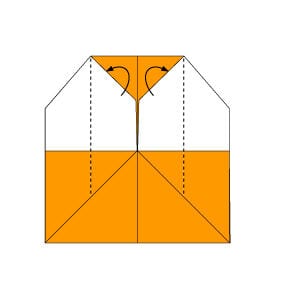
STEP 13.
Fold the paper so that the dotted line sits on the inside.
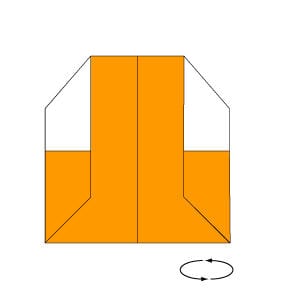
STEP 14.
Turn the paper over.
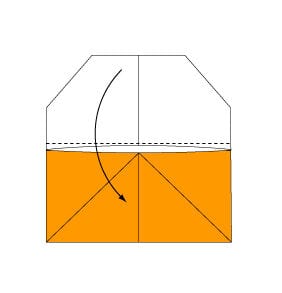
STEP 15.
Fold the paper along the dotted line in the direction of the arrow.
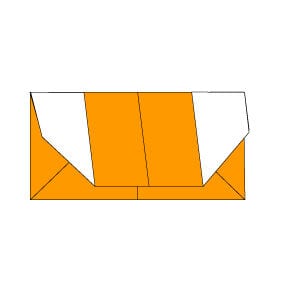
STEP 16.
Your origami card case is complete!




