
Pocket-fold In Origami
Some origami diagrams are full of little symbols that look like a secret code, and the pocket fold is one of the easiest to learn. A pocket fold is a mountain fold made in the middle of a flap while the two edges are flat folded at the same time - the result looks like a little pocket, which is where the name comes from.
In this tutorial I will show you how to read the symbol and make the fold yourself in five steps. We will use the same sheet for a right-fold and a left-fold example, so you can follow both directions. Grab a square of paper and let's fold.
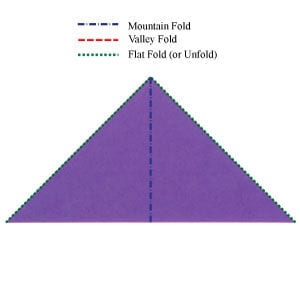
The pocket fold is a technique that applies a mountain fold in the middle of the paper while applying two flat folds along the edges.
The “pocket fold” symbol is drawn with two flat folds and one mountain fold. The arrow shows the direction the pocket will be folded.
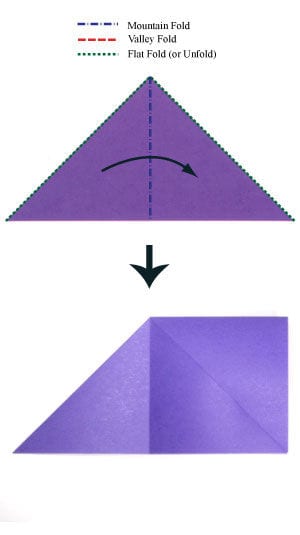
Here the arrow points to the left, meaning the pocket will be folded to the left.
Step 1
A pocket fold symbol is shown on the left.
Step 2
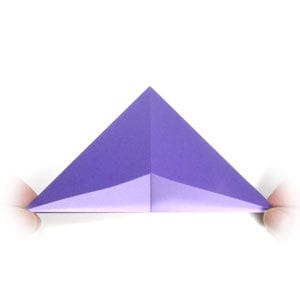
Start by applying a mountain fold in the center, while flat folding the two edges.
Step 3
Finish the mountain fold in the center with both edges flat folded. Now get ready to fold the flap to the right or left, depending on the arrow direction on the symbol.

Step 4
Fold the flap to the right, following the arrow direction.
Step 5
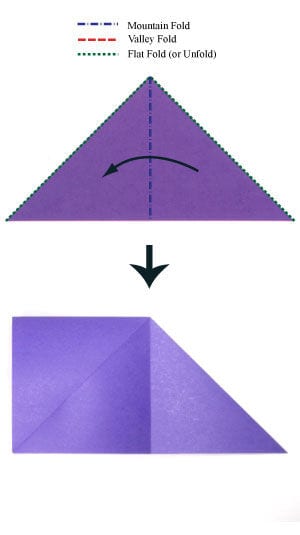
If the arrow points to the left, fold the flap to the left instead.




