
High heels
Shoes are a surprisingly satisfying subject for origami, and these little high heels are among the cutest you can fold. Everything comes from one square of paper — no glue, no cutting — and the result actually stands up, complete with a shaped heel and a soft, rounded toe. The folding itself is a pleasant mix of precise creases and a few moments where you coax the paper into shape with your fingers.
The tutorial makes one shoe, so the last step is the fun part: fold a second one and you have a pair. They look lovely on a shelf, make a sweet handmade gift for someone who loves shoes, and are small enough to tuck into a card. Try them in bold paper for a statement pair, or fold them tiny from a small square and slip them onto a doll.
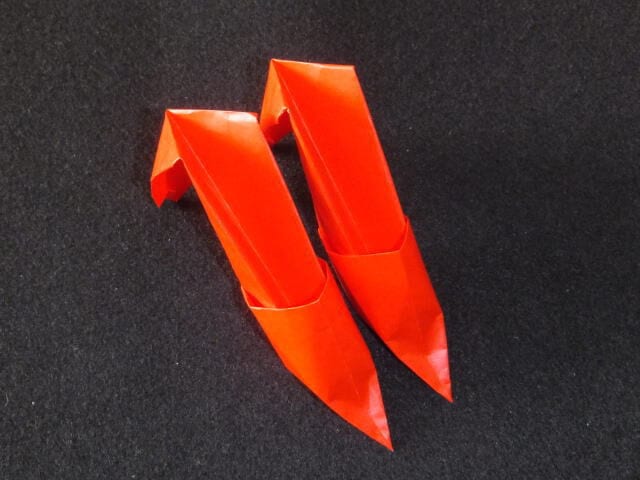
Way of folding
STEP 1 With the white side facing up, fold the paper into a triangle and make vertical and horizontal creases.
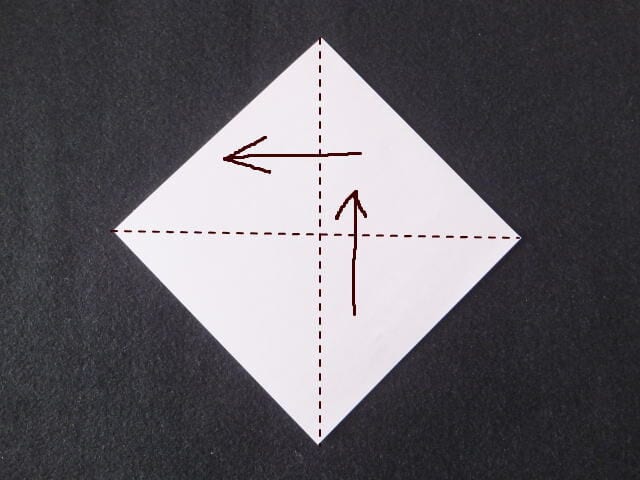
STEP 2 Fold it from three directions toward the center.
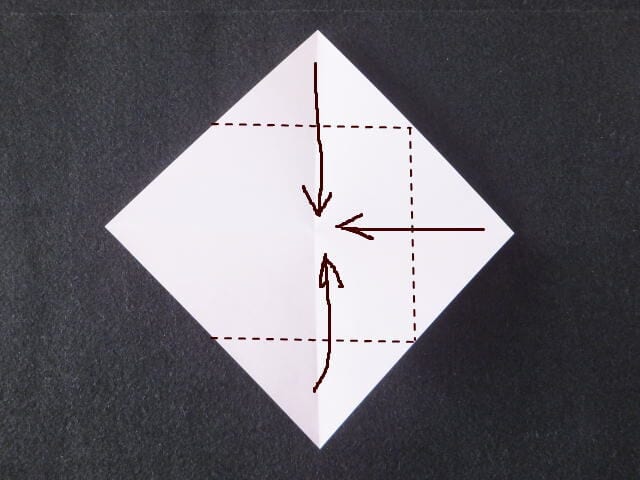
STEP 3 After folding, turn it over.
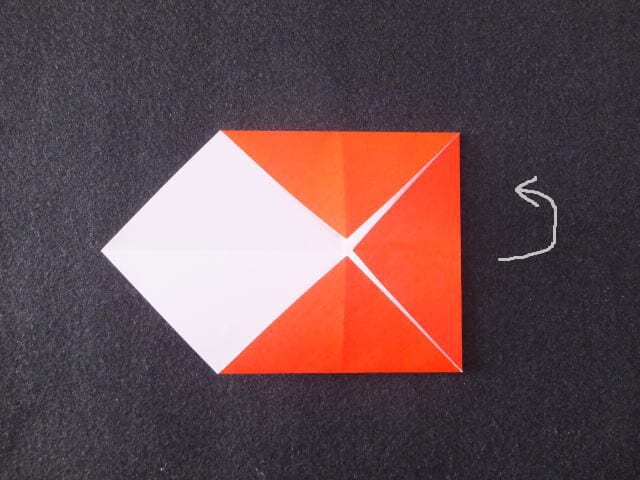
STEP 4 Fold along the dotted line toward the center crease. Do not fold the triangular part on the back along with it; let it show through to the front.
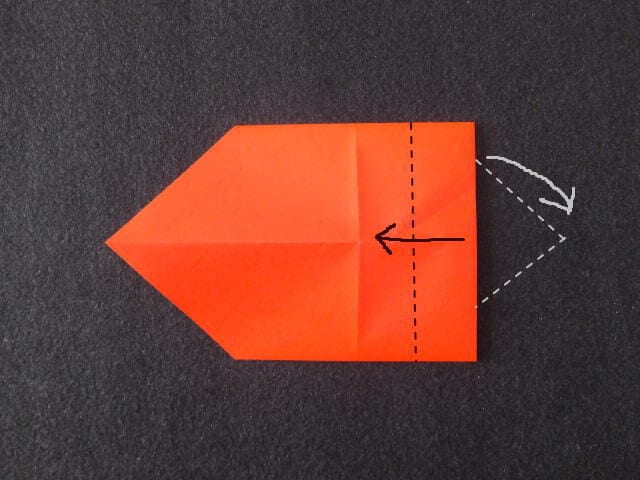
STEP 5 After folding, open the triangular part to the left.
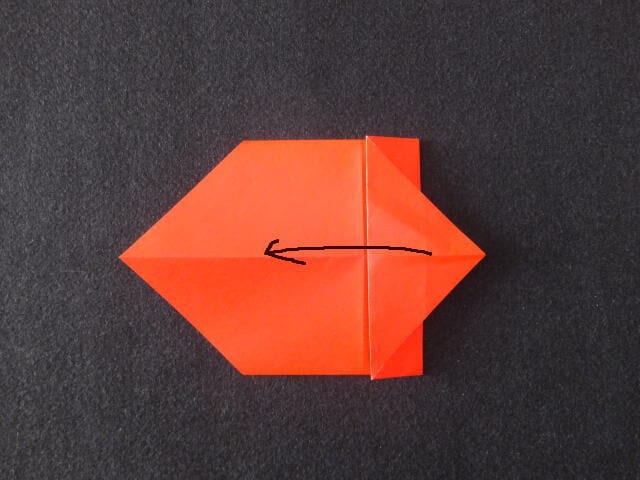
STEP 6 Fold the corner toward the fold line to make a triangle. After folding, put the unfolded triangular part back in place.
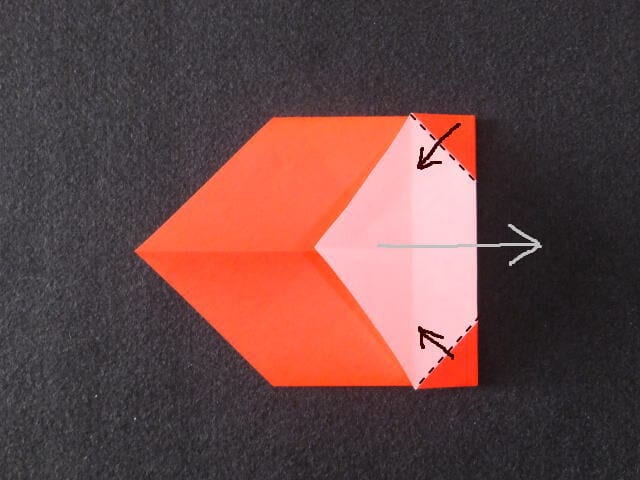
STEP 7 The left side is folded. After folding, turn it over.
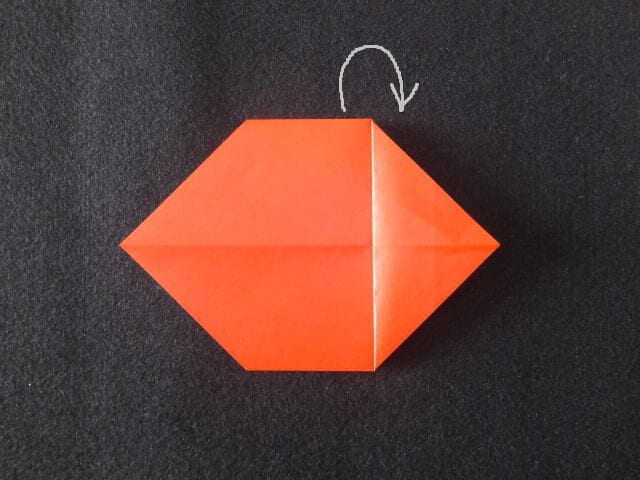
STEP 8 Fold along the dotted line toward the center fold line.
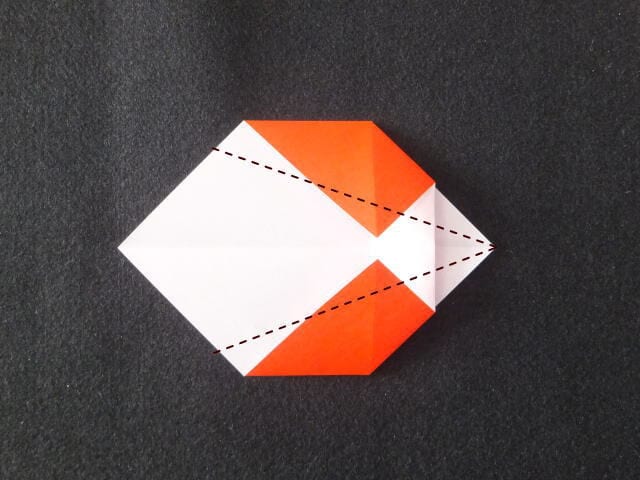
STEP 9 Fold outward from the center, with the crease facing down.
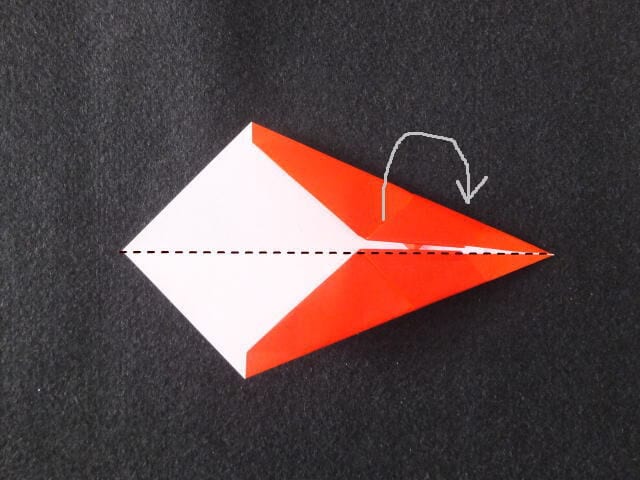
STEP 10 Pull out the inner layer on the right side as shown by the dotted line.
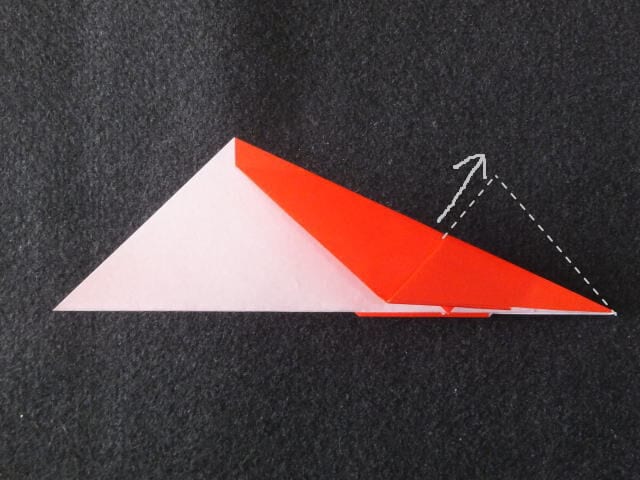
STEP 11 While pressing from both sides, pull it upward; once the inner creases are adjusted, press them down firmly.
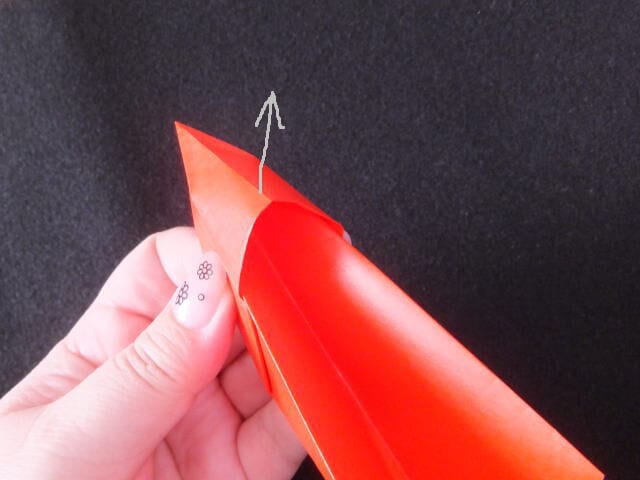
STEP 12 Pull down the ● part of the upper layer so that it lines up with the lower edge.
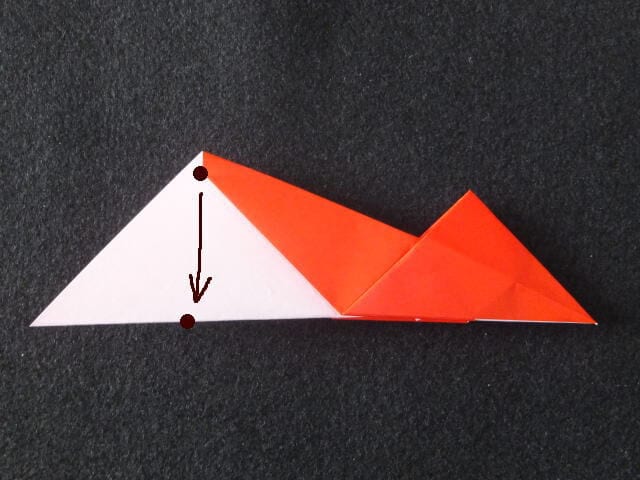
STEP 13 Shift only the top layer. The center will move, so stretch the back side in the same way to adjust it.
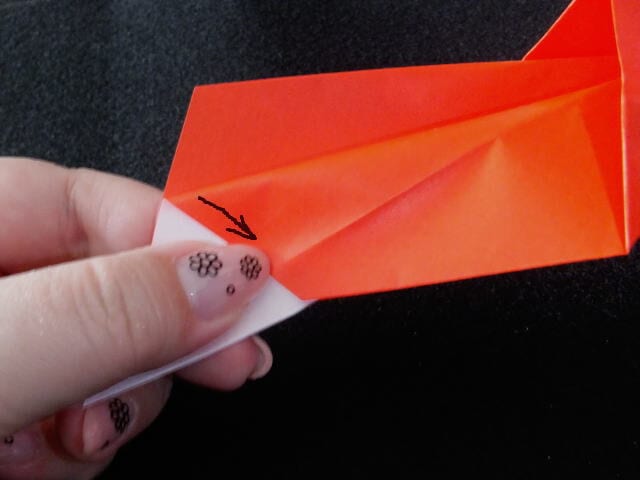
STEP 14 Once everything is in place, open the top layer with the top side facing up.
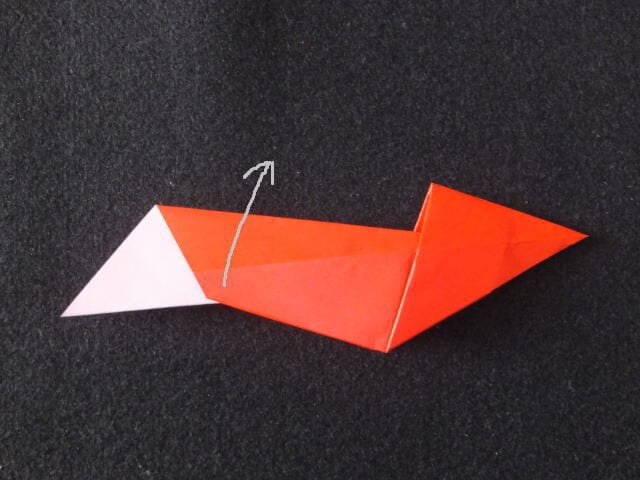
STEP 15 Align the ● and ● edges of the opened section and fold along the dotted line.
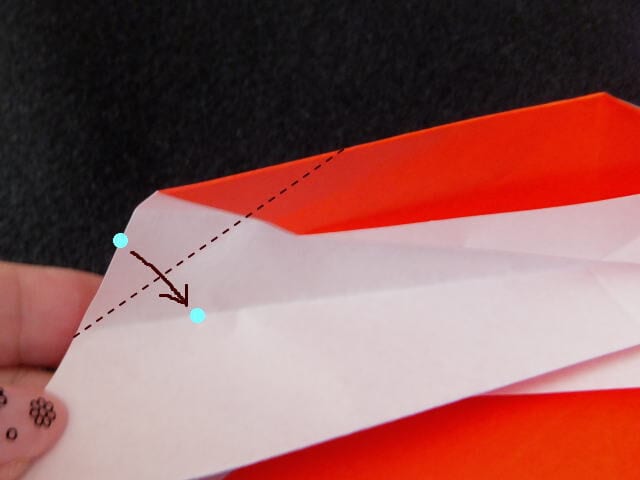
STEP 16 After folding, align the ● and ● edges again and fold along the dotted line.
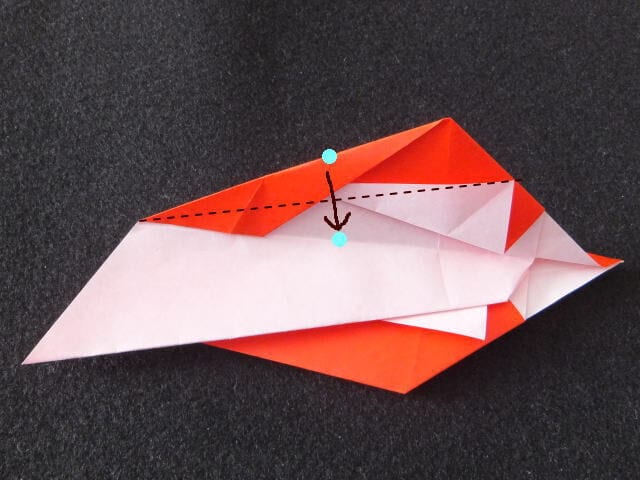
STEP 17 Now undo back to the first crease. Fold the back side in the same way as in step 14.
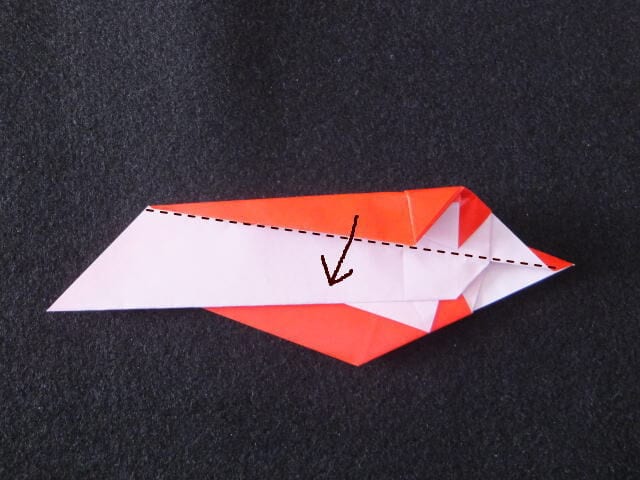
STEP 18 Fold along the dotted line so the ● and ● edges line up. Fold the back side the same way.
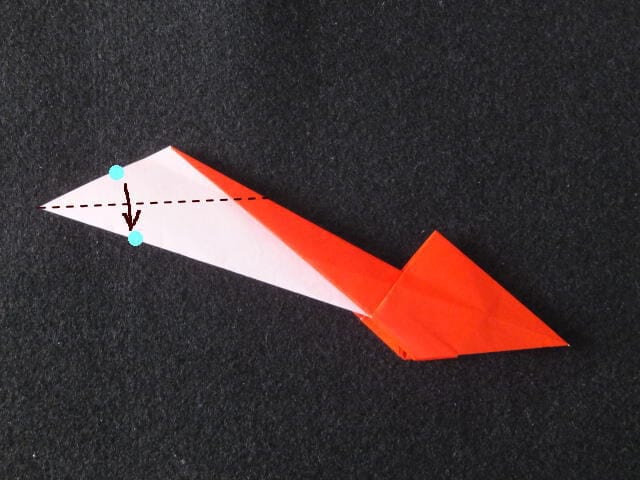
STEP 19 Make a crease downward from the dotted line.
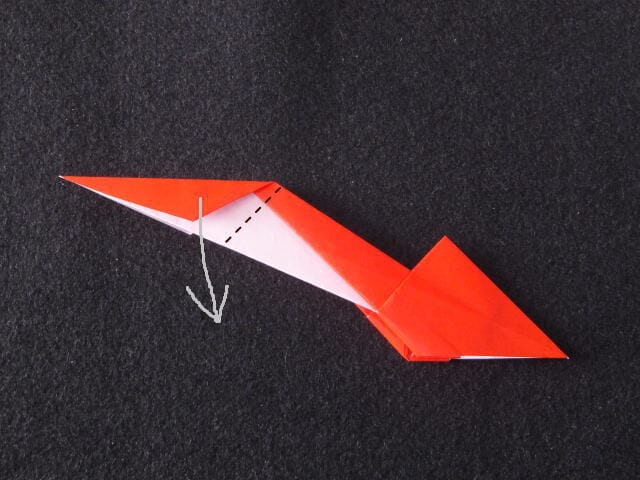
STEP 20 Once the crease is pressed firmly, fold the paper back over along that crease.
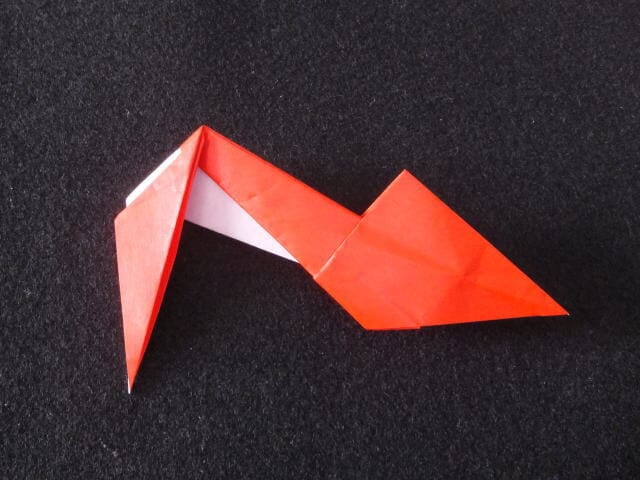
STEP 21 It is easier to fold if you spread it out to the left and right first, then fold it over.
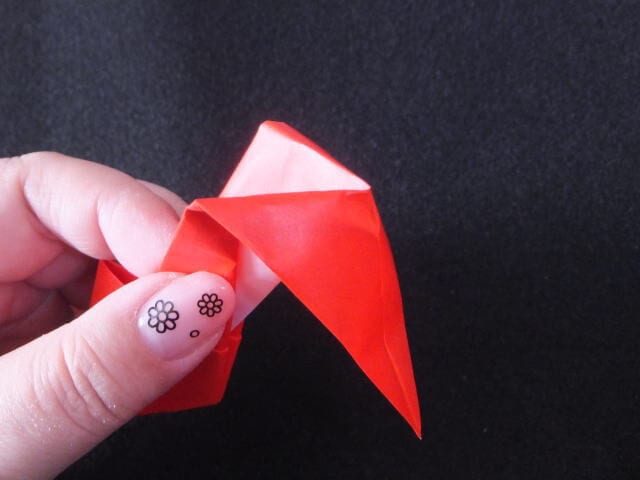
STEP 22 Fold the heel section in half so that it is the same height as the front part.
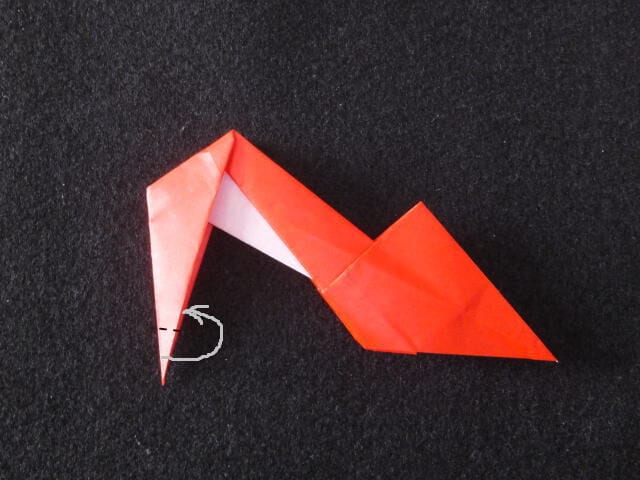
STEP 23 It is now folded into a flat shape.
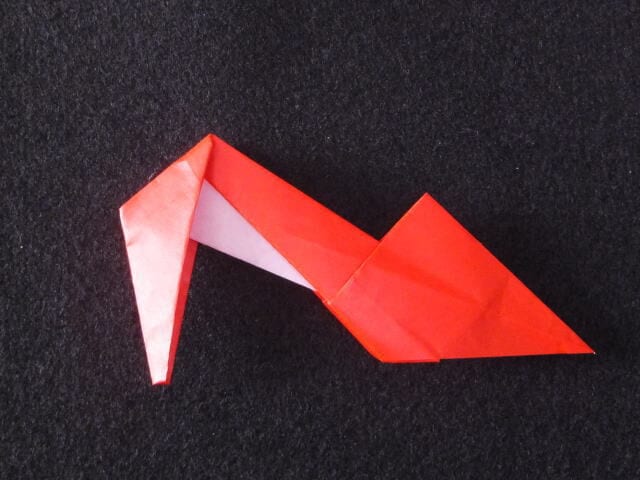
STEP 24 Shape the front part into whatever form you like.
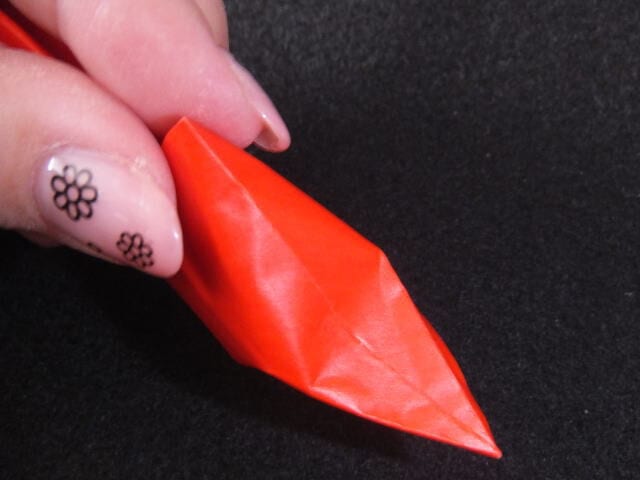
STEP 25 Open it out slightly from the center to the left and right, let it stand up, and it is done.
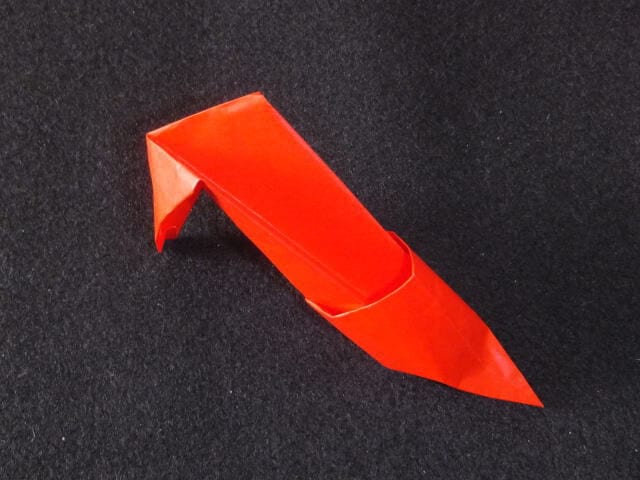
STEP 26 Make a second one just like it, and you will have a pair of high heels.
Tips for folding
The front part gets thicker as you fold, so press it down firmly.
If you want a rounded tip, fold the end back a little.
It is also fun to make these from small paper and slip them onto dolls or stuffed animals.




