Origami Box (Short Tutorial)
A little paper box is one of the most useful things you can fold — no glue, no scissors, just a square and a few creases. This short version gets you a tidy open container in eleven steps, perfect for corralling sweets, rings, or random desk odds and ends.
The clever bit is at the ends: you open the paper along a couple of new diagonals and the walls stand up on their own, then a fold over the top locks everything in place. And because the lid is just a second box made from a slightly bigger square, you can build a whole matching set in your favourite colours.

So use colourful paper — double-sided is best — and make lots of these: then you’ll be so organised! They are great for holding lollies, trinkets, jewellery… well, just about anything really.
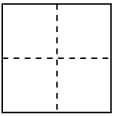
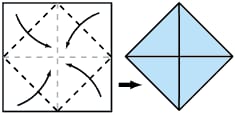
STEP 1. Start with a square piece of paper. Fold the paper in half horizontally and then vertically, so the creases look like this.
STEP 2. Fold the four corners of the paper toward the center point.

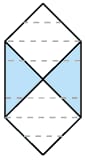
STEP 3. Fold the top and bottom of this square into the center and open out again to create these creases.
STEP 4. Open out the top and bottom triangular flaps.
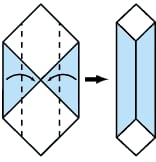
STEP 5. Fold the sides of the model into the center, creasing well.
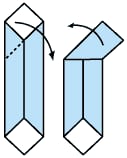
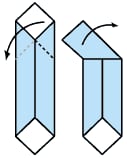

STEP 6. Fold down the top corner of the model and then open out again.
STEP 7. Fold the model down in the other direction.
You should now have two new diagonal creases like this.
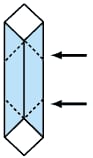
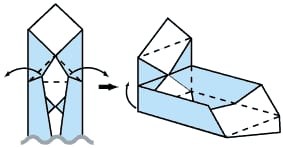
STEP 8. Repeat steps 6 and 7 at the other end of the model, so you have the new creases at both ends.
STEP 9. At one end of the model, open the model out along the creases you just made. This will raise the top portion of the model vertically.
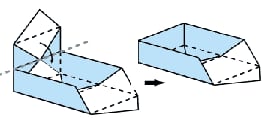
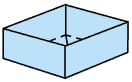
STEP 10. Fold the top of the model over into the box. It’s taking shape!
STEP 11. Repeat steps 9 and 10 at the other end of the box… and it’s finished!
To make a lid, just make another box, but start with a slightly bigger piece of paper.