Origami Flying Duck
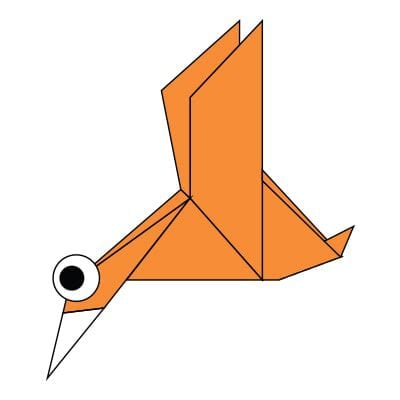
There’s a reason the flying duck is a paper-folding classic: a few clean folds, two reverse folds, and suddenly it’s mid-flight with wings spread.
If you’ve done a couple of beginner models, this is a friendly place to meet the reverse fold for the first time. Grab a square and let’s get it airborne.
These instructions will show you how to fold an easy origami flying duck. If you’re new to paper folding, take a moment to review a beginner’s guide that covers all the basic folds and techniques.
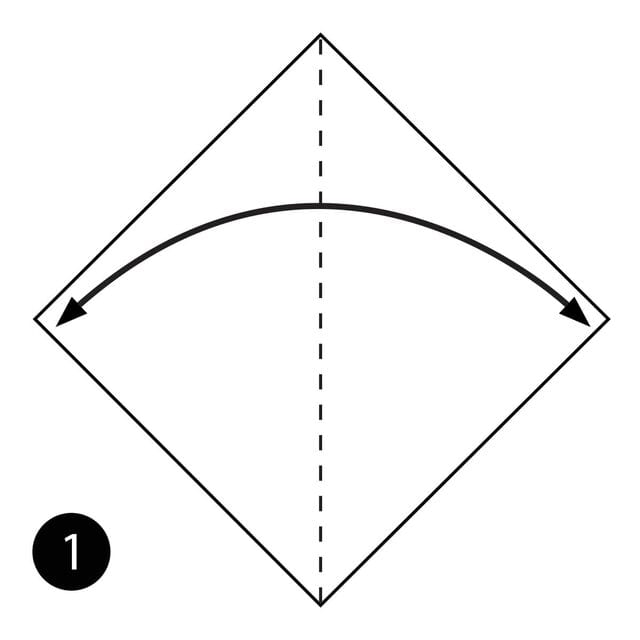
STEP 1. Fold the paper in half and then unfold it.
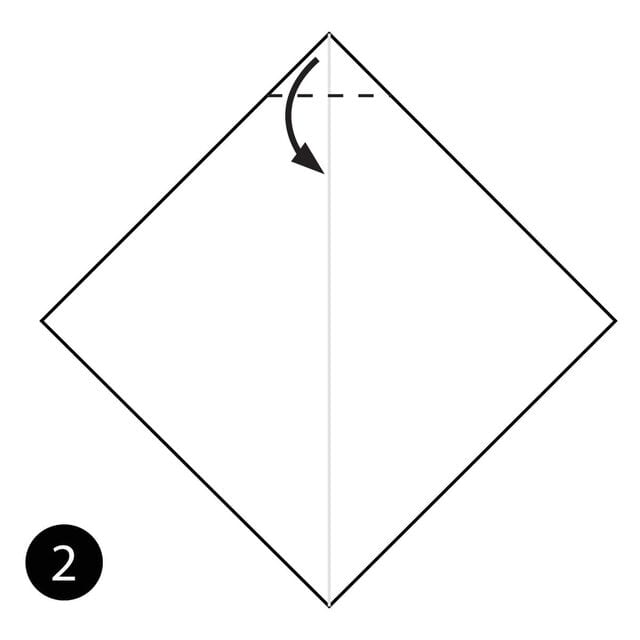
STEP 2. Fold the top of the paper down along the dotted line.
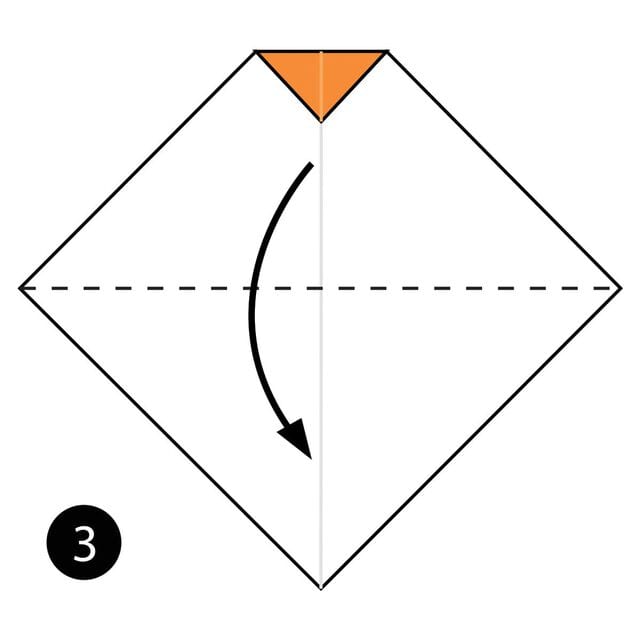
STEP 3. Fold the paper in half along the dotted line.
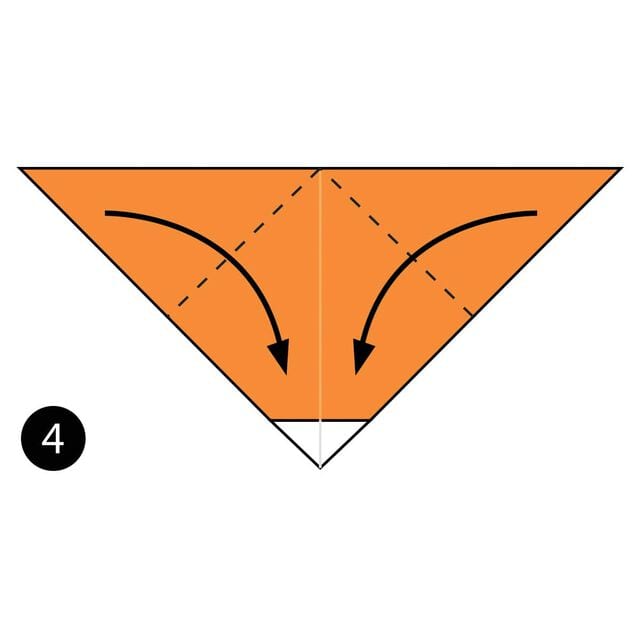
STEP 4. Fold the two sides down along the dotted lines.
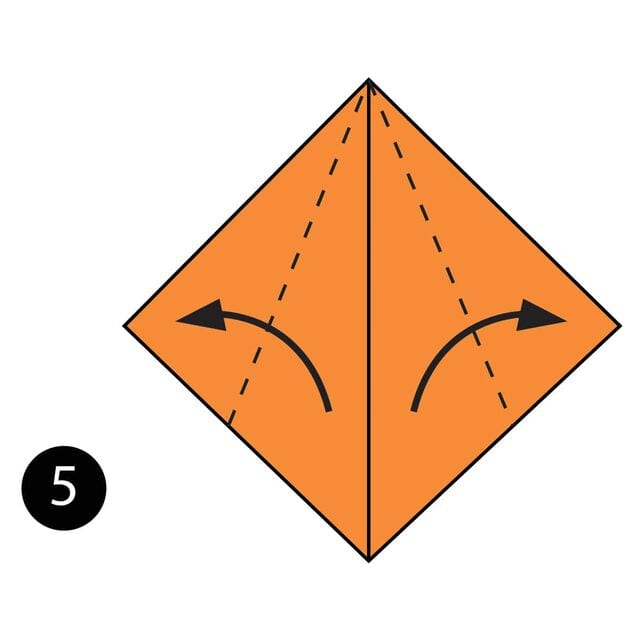
STEP 5. Fold the sides out along the dotted lines.
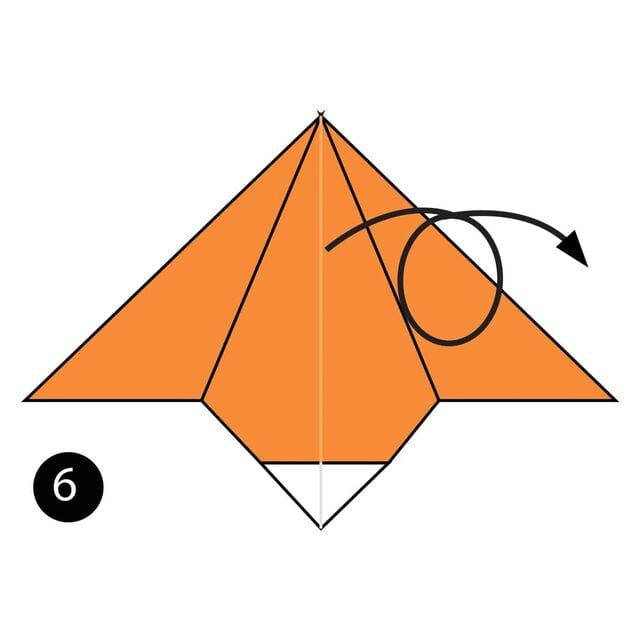
STEP 6. Turn the paper over.
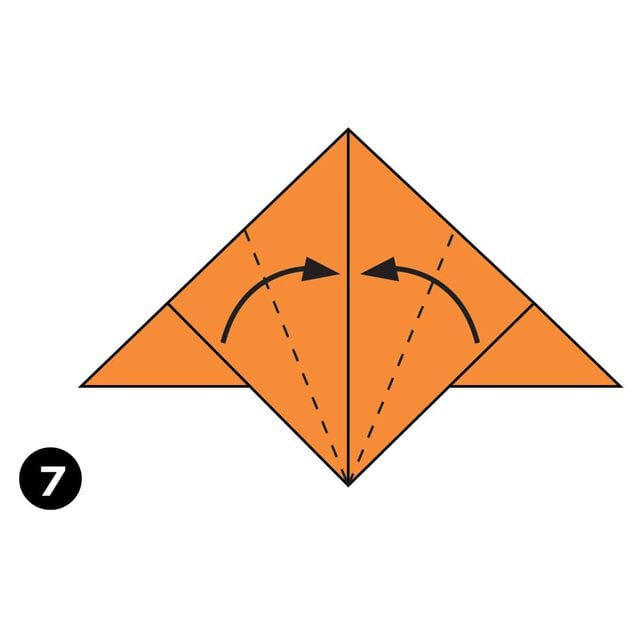
STEP 7. Fold the sides in along the dotted line. Flatten the wings so they look like they do in the next step.
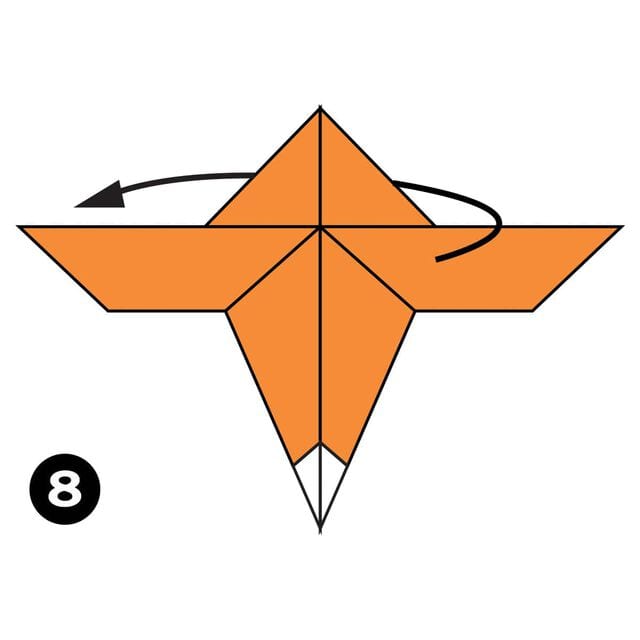
STEP 8. Fold the paper in half behind the model.
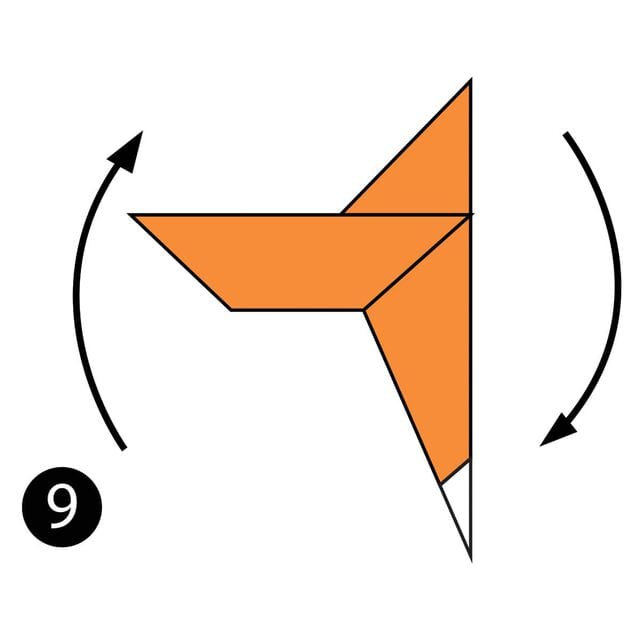
STEP 9. Rotate the model about 90 degrees.
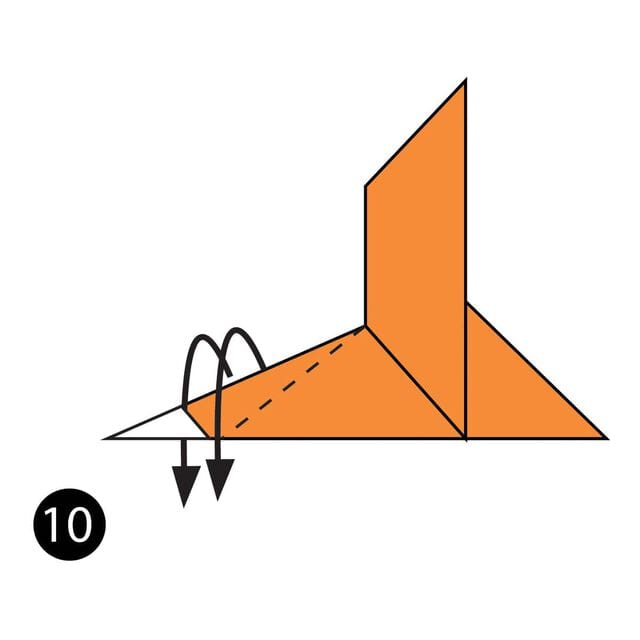
STEP 10. Make an outside reverse fold along the dotted line.
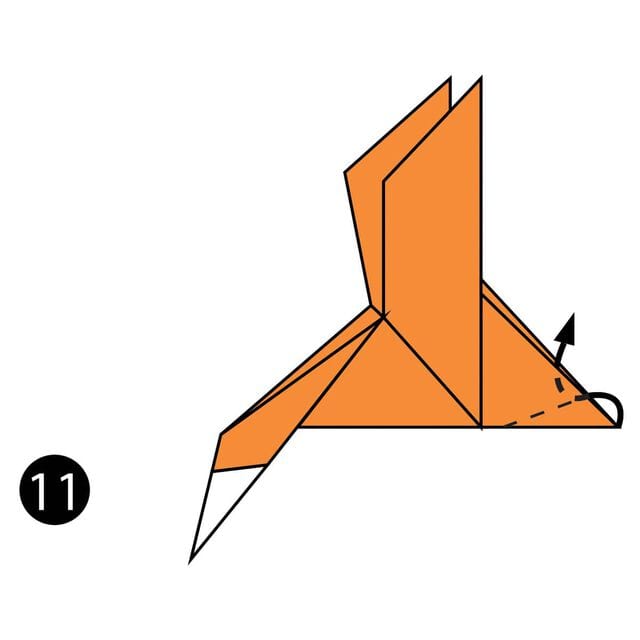
STEP 11. Make an inside reverse fold along the dotted line to form the tail.
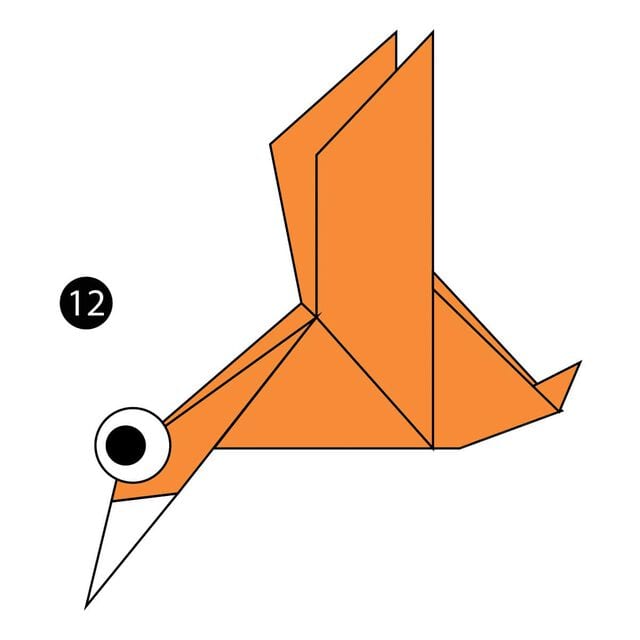
The completed flying duck.