Grasshopper
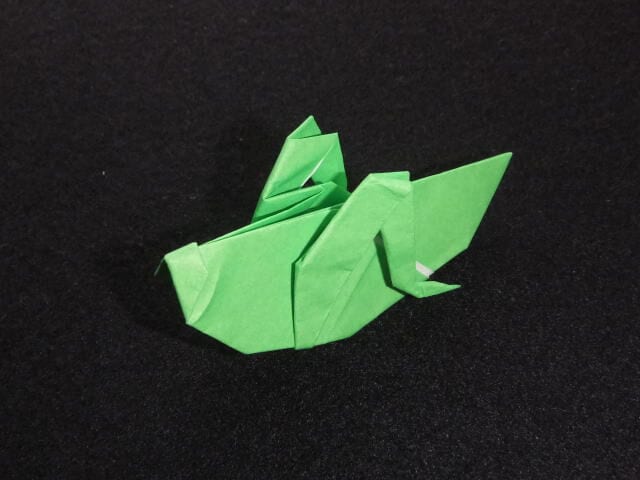
Few origami insects capture the imagination quite like the grasshopper. The first time you see one finished, you almost expect it to hop off the table — long legs tucked, body angled as if mid-jump. In this tutorial we'll build one step by step from a single square sheet. It's a satisfying project if you've already folded a few simpler models and want something with a bit more character. Don't rush the creases; the magic of this little critter is all in the crisp folds that let it stand on its own. By the end you'll have a tiny grasshopper that looks ready to leap — and with a pair of antennae added, it's nearly impossible to tell from the real thing.
Way of folding
STEP 1. Turn the white side up and make a triangular crease on the side, then put it back.
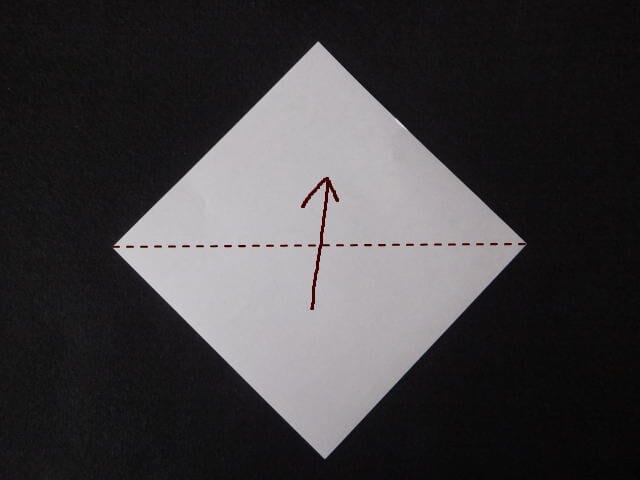
STEP 2. Fold it vertically into a triangle.
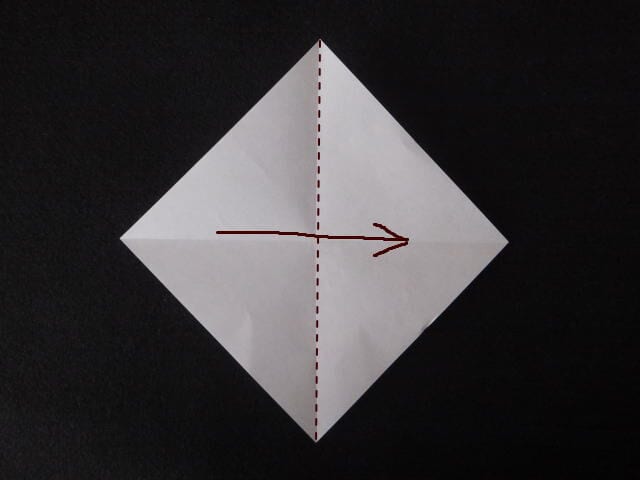
STEP 3. Fold it so that the top and bottom corners are aligned with the right corner.
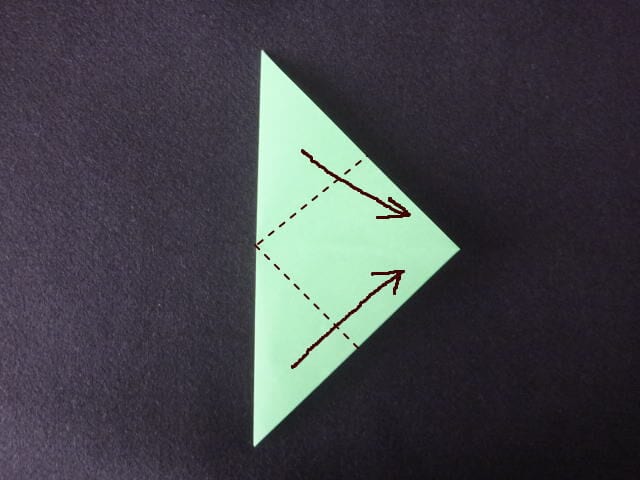
STEP 4. Fold it up and down toward the center. After making a crease, return it to a square.
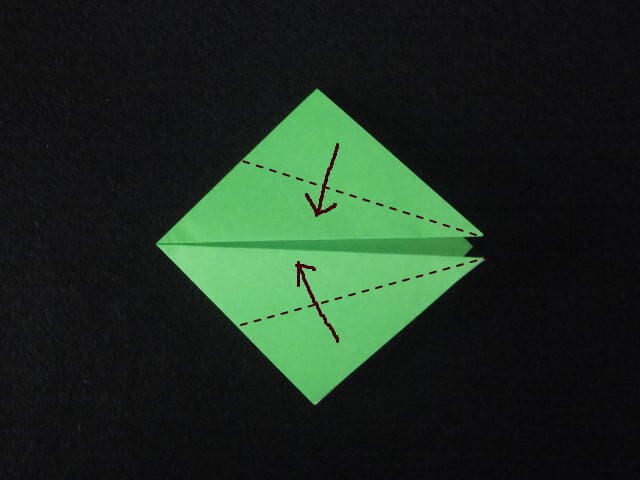
STEP 5. Fold it from the corner of the crease (white circle) toward the center as shown by the dotted line. Once you have made the creases firmly, return them to the square.
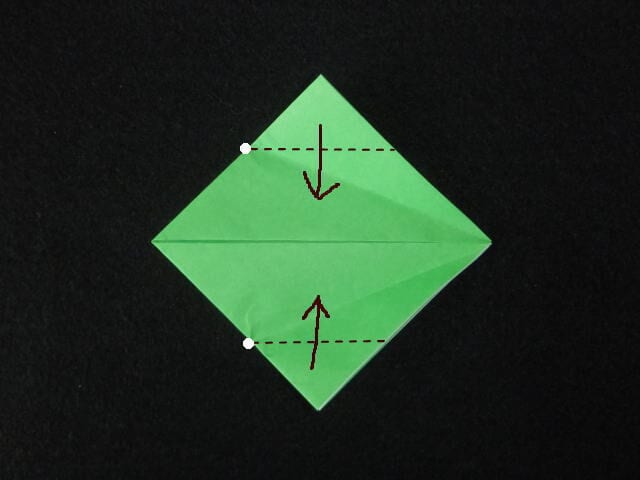
STEP 6. Fold it in the middle along the 5th crease.
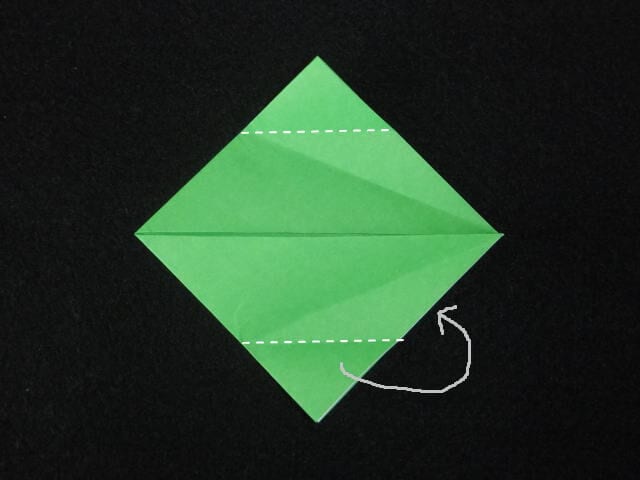
STEP 7. It is in the middle of folding.
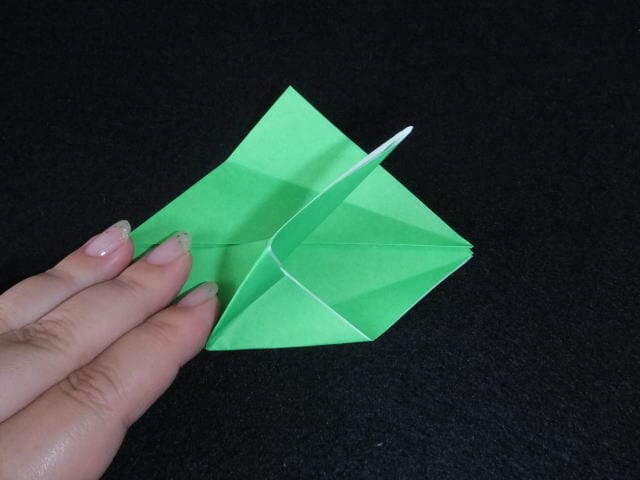
STEP 8. Fold the upper side in the same way.
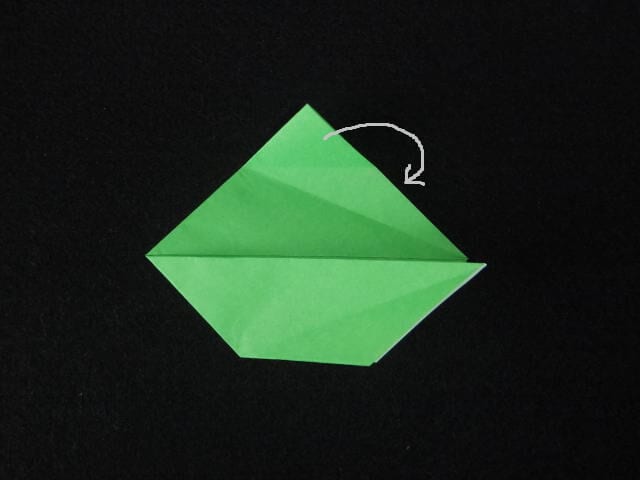
STEP 9. Fold the left side about 5 mm.
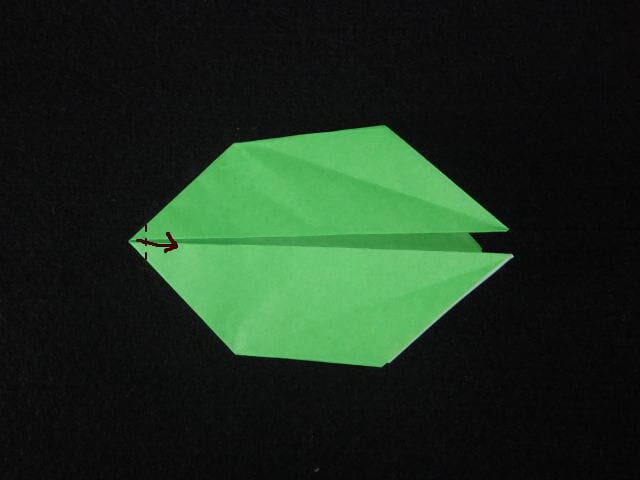
STEP 10. Fold it again in the same way as 9.
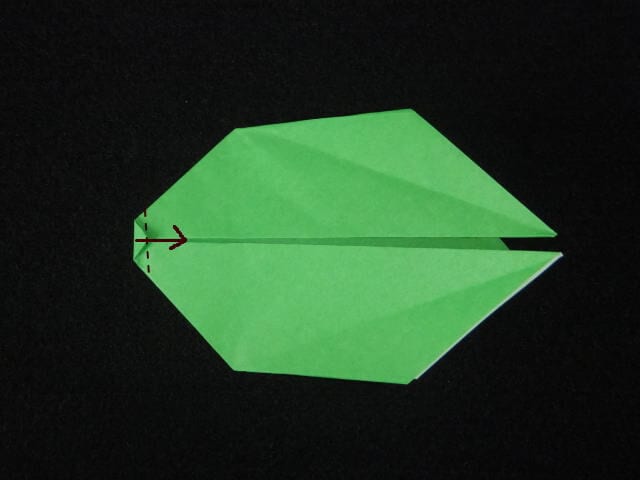
STEP 11. Fold it in half to the outside.
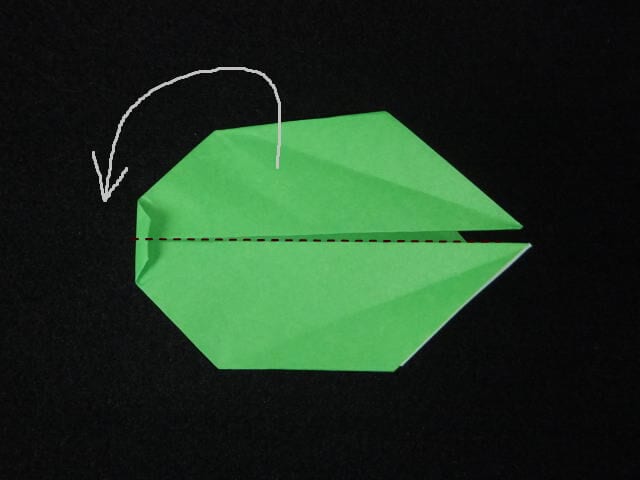
STEP 12. Fold it up while opening the right corner as shown by the dotted line.
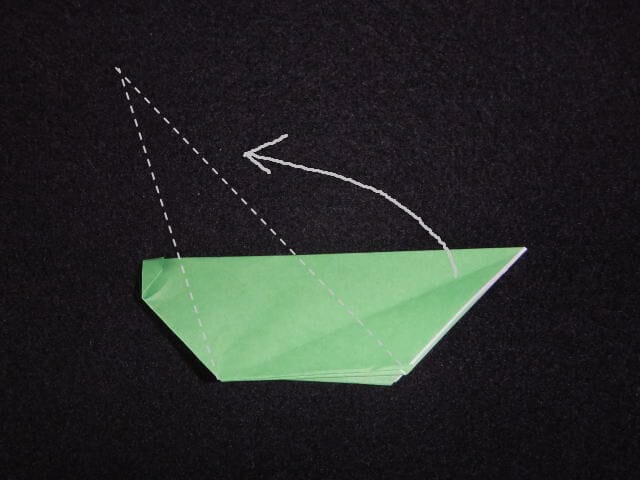
STEP 13. Hold the section folded at step 6 and fold it in half vertically while opening it out.
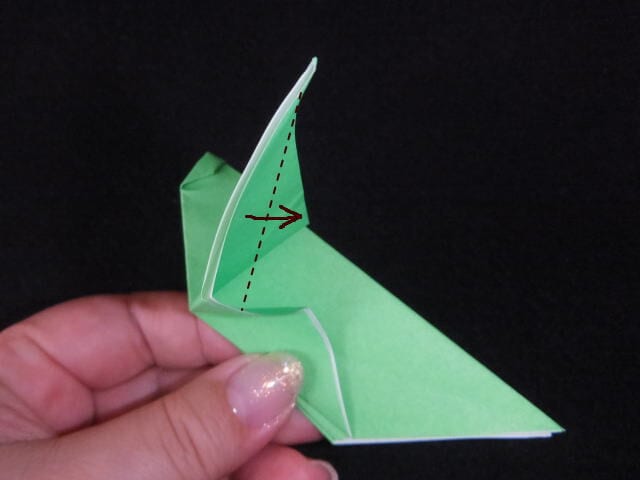
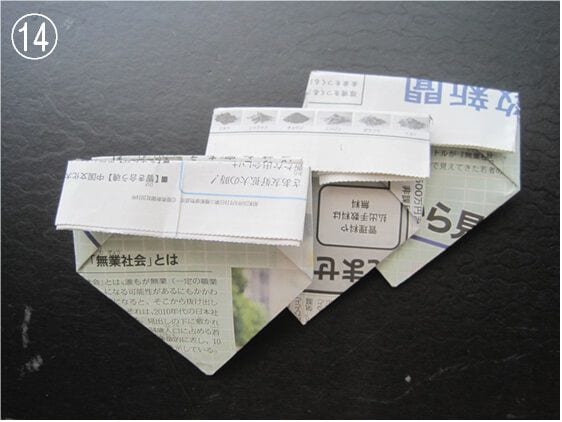
STEP 14. The front is folded. Fold the back the same way.
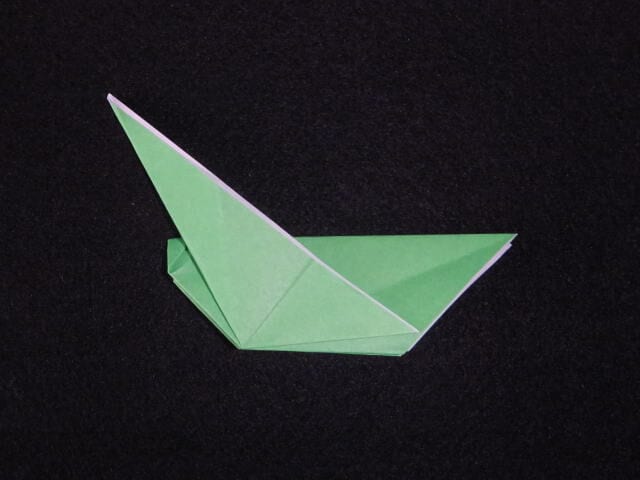
STEP 15. While pressing from the outside, make a crease as shown by the dotted line. If you get a crease, fold it back.
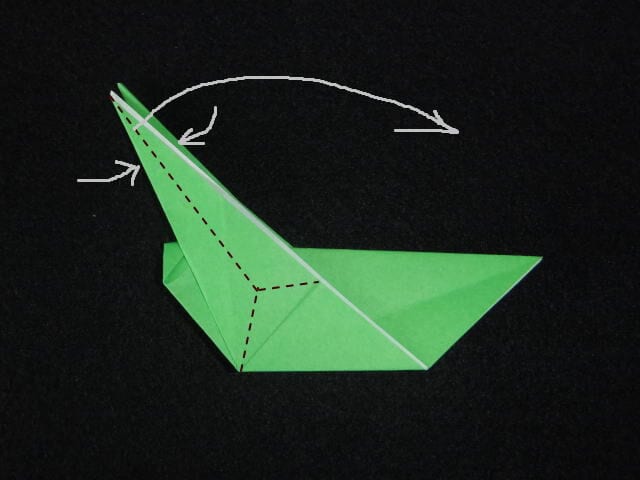
STEP 16. Press both sides at the halfway point.
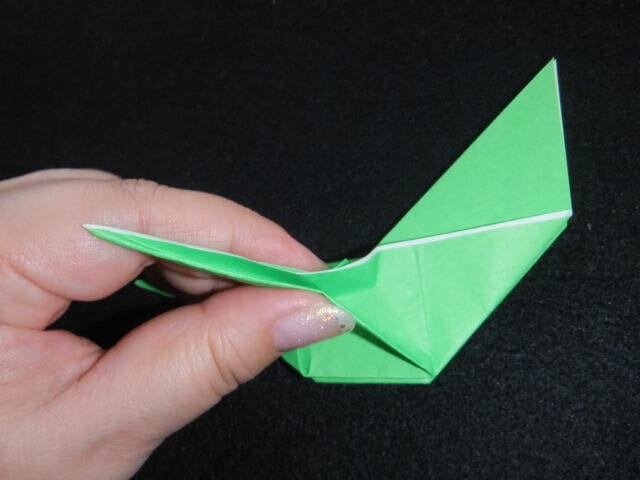
STEP 17. You can achieve a clean fold by starting where the ○ marks do not overlap.
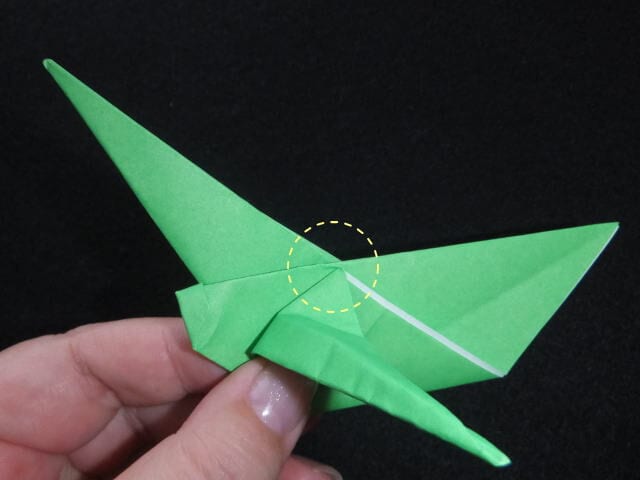
STEP 18. The front is folded. Fold the back the same way.
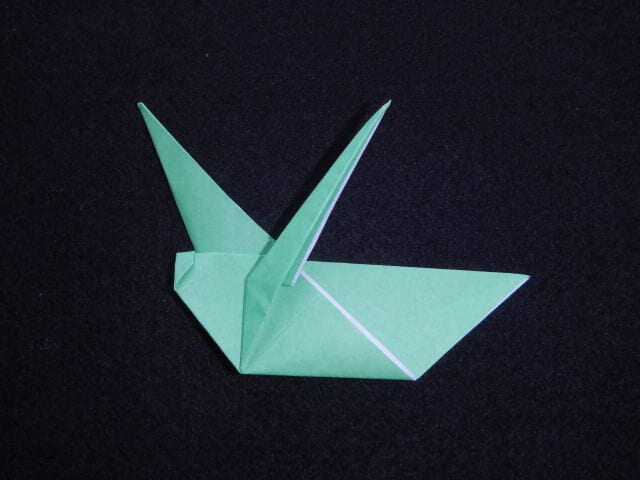
STEP 19. Fold the back part along the dotted line and fold it from the crease to the middle.
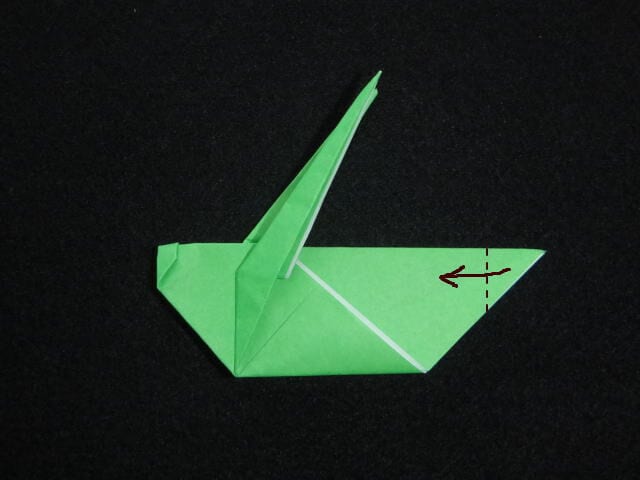
STEP 20. Once opened, you can fold it neatly.
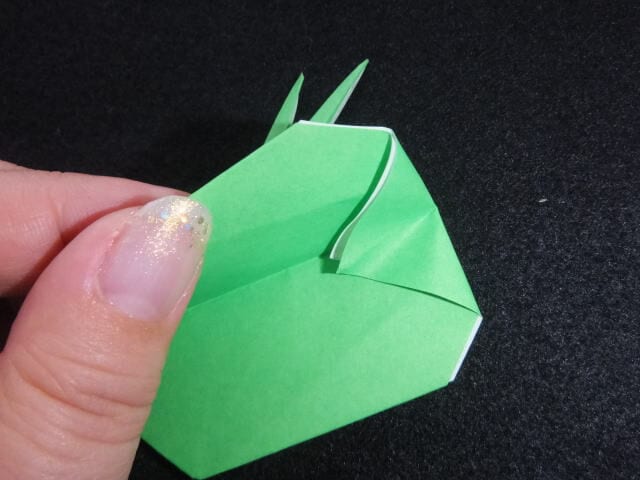
STEP 21. Fold it inward as shown by the dotted line. Fold the back side in the same way.
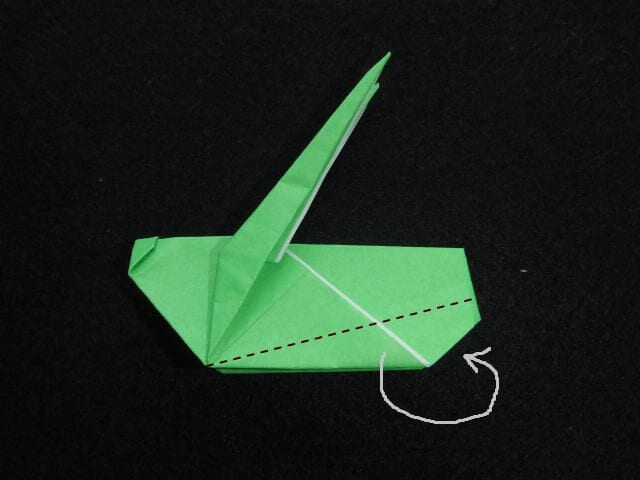
STEP 22. Fold the corners inward as shown by the dotted line. Fold the back side in the same way.
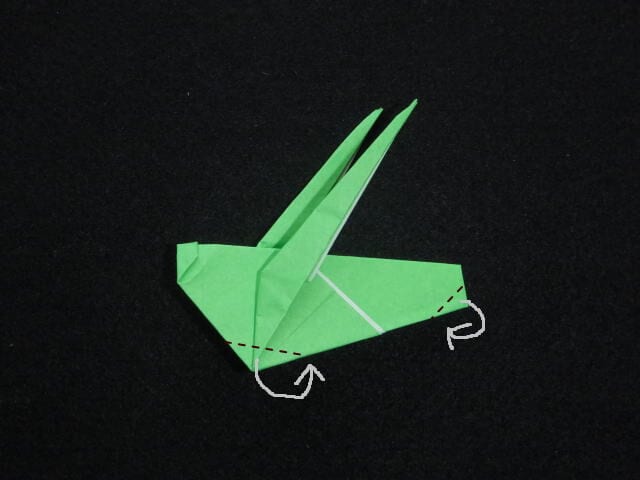
STEP 23. Fold the legs down as shown by the dotted line.
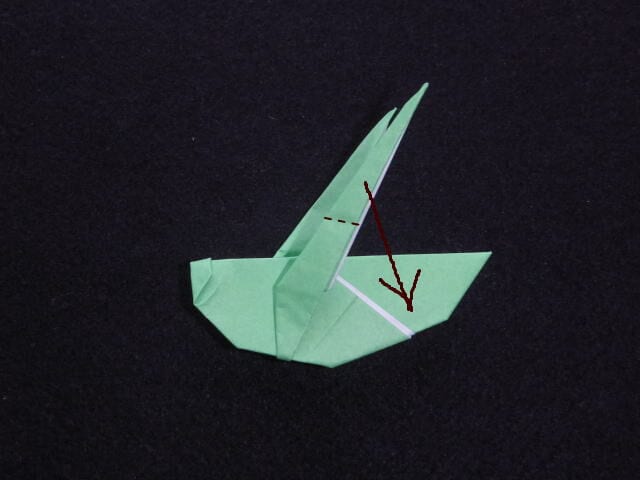
STEP 24. Make a crease and fold it in the middle.
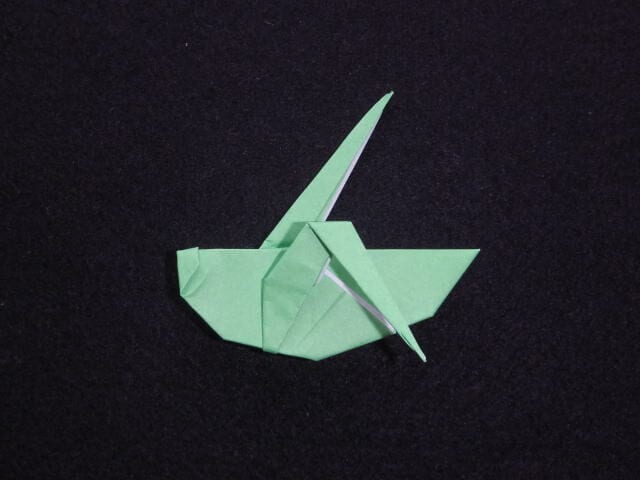
STEP 25. Make a crease on the tip and fold it in the middle.
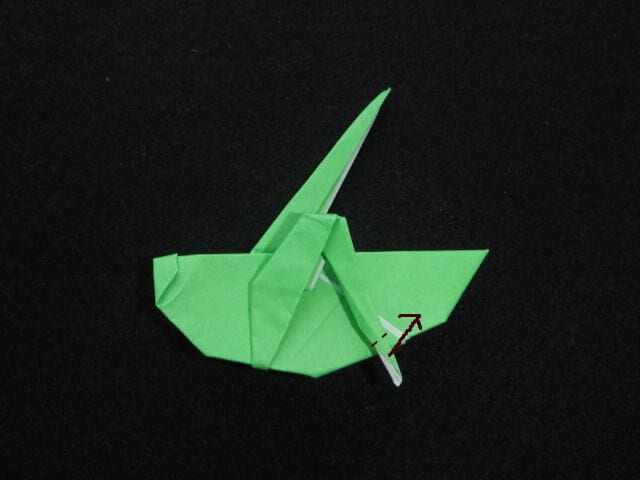
STEP 26. The front leg is ready.
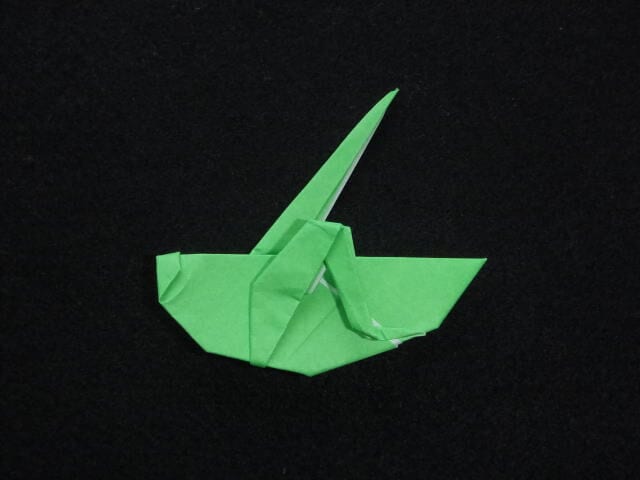
STEP 27. Fold the back side in the same way as the front side.
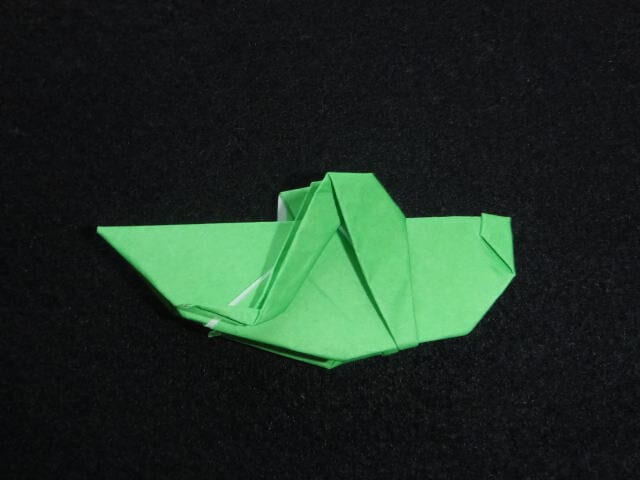
STEP 28. Let's open it up a little and let it stand.
Points when folding
When making a crease, such as before the middle fold, hold it firmly.
Make sure to hold the corners inward so that they do not open.
What do you think? It looks like a real grasshopper, doesn’t it?
Adding antennae to the head will make it even more authentic.