Triceratops (Complete Tutorial)
After the Tyrannosaurus, the triceratops is the dinosaur everyone knows on sight — that three-horned face and giant frill. This complete tutorial walks the whole model in careful, photo-rich stages, so it’s longer and a bit more involved than a quick fold, but wonderfully satisfying. If you already made the matching T. rex, this is its natural rival; fold both and you’ve got the Cretaceous’s most famous showdown on your shelf. It’s a great one to tackle with a parent or an older child, since the many layered body folds reward patience. Grab a square — green, blue, whatever you like — and let’s build the triceratops.
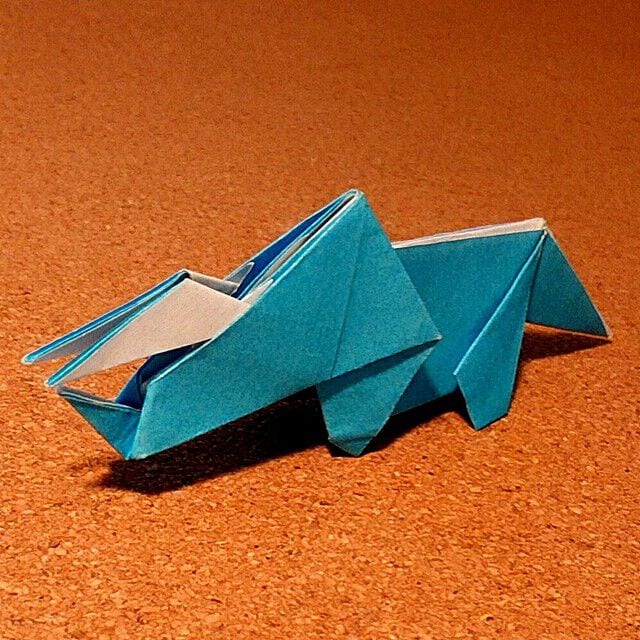
The triceratops is the dinosaur everyone pictures right after the Tyrannosaurus — the three-horned herbivore with the giant frill. After folding the origami T. rex I shared earlier, this is its worthy rival. Triceratops stretched about 9 meters long and weighed an estimated 5–6 tons, surprisingly close to a T. rex in heft. If you imagine those two going head to head, you’re not alone — I blame my dinosaur-loving son. This complete tutorial has many steps, so it’s a great one to fold alongside a parent.
How to fold origami triceratops
What color did Triceratops have? There is a dark green image in pictorial books, but since it is all estimated, you may use any color you like.
This time I tried to make it light blue. We will fold it in one sheet, so please prepare origami immediately.
This time I referred to this video
STEP 1. Turn it over and make creases in two places , vertical and horizontal .
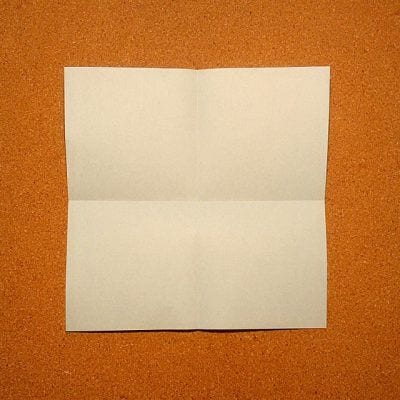
STEP 2. Fold the upper and lower sides along the horizontal center line.
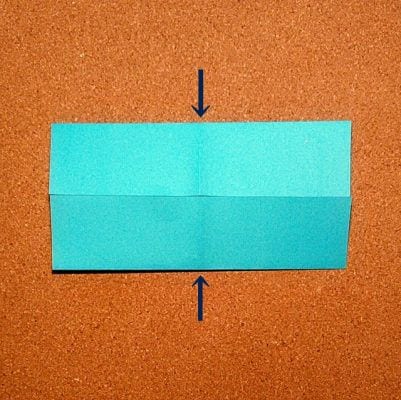
STEP 3. Fold both ends along the vertical center line.
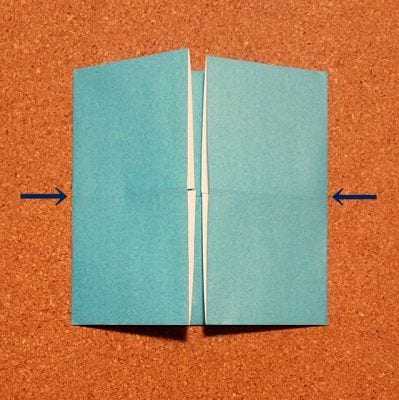
STEP 4. Open the top and bottom on the left side like a bag and fold it as shown in the photo.
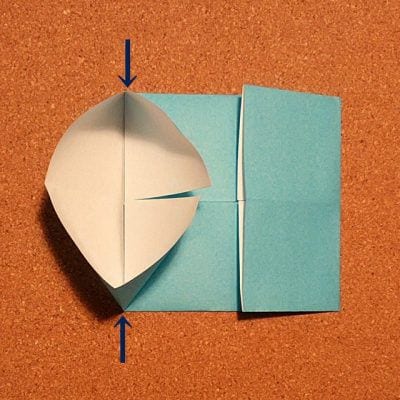
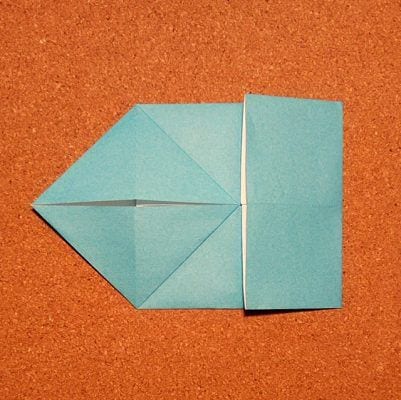
STEP 5. Open and fold the top and bottom on the right side in the same way.
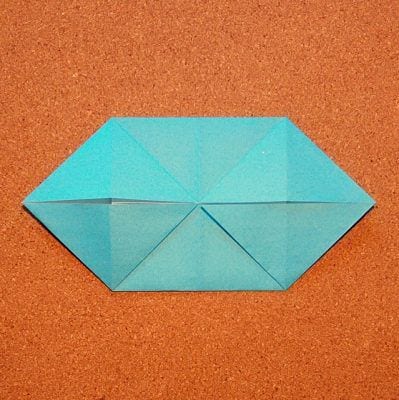
STEP 6. Tilt the upper side backward along the horizontal center line and fold it in half.
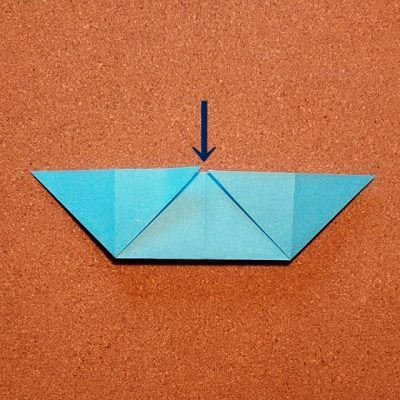
STEP 7. Align the lower right corner with the upper side and fold it.
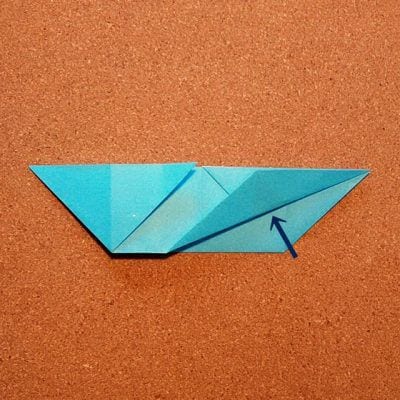
STEP 8. Open the folded part in the direction of the arrow in the photo and unfold it into a triangle.
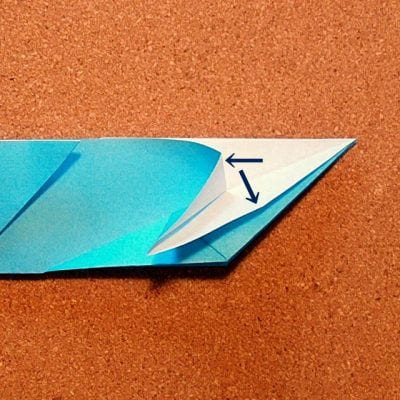
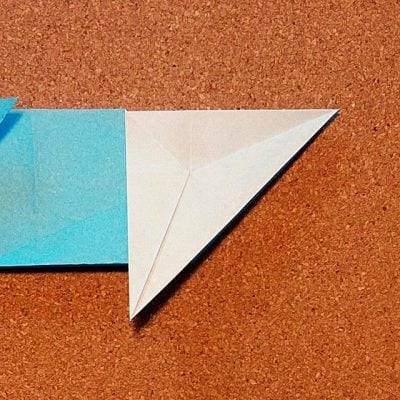
STEP 9. Close the triangular part in the direction of the arrow in the photo and fold it.
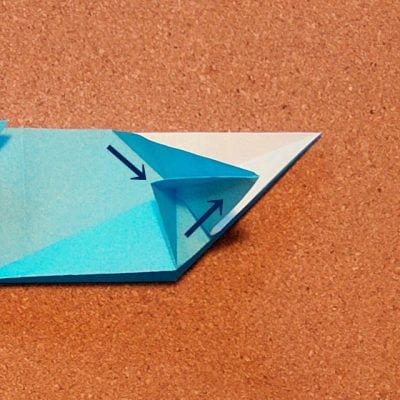
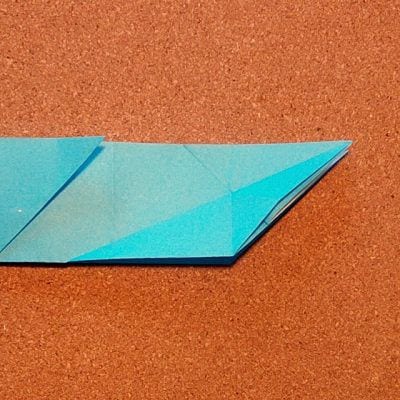
STEP 10. Fold the folded lower right corner again along the upper side.
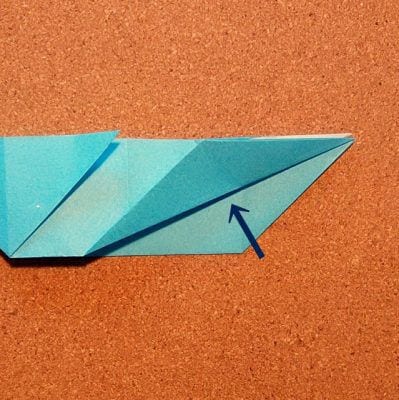
STEP 11. Pull out the inner corner of the folded part, twist it toward you, and fold it so that it is perpendicular to the upper side as shown in the photo.
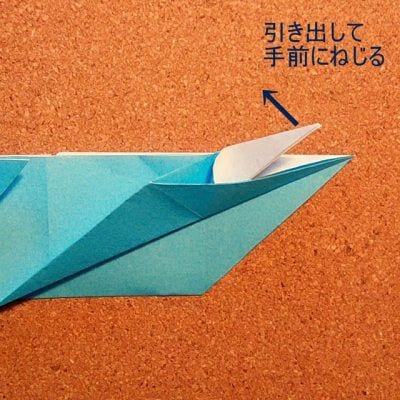

STEP 12. Turn it over from right to left, twist the corner folded at a right angle to the far left, and fold it.
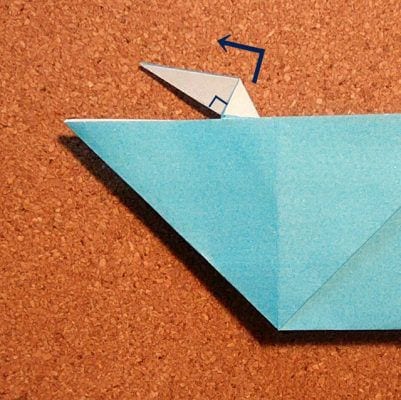
STEP 13. Align the lower left corner with the upper side and fold it.
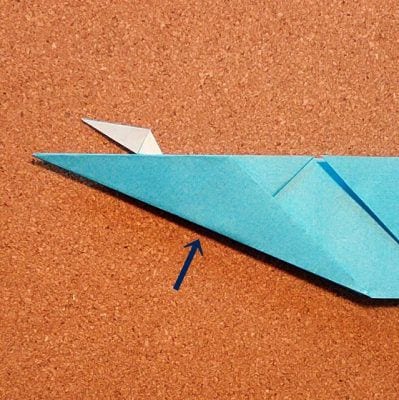
STEP 14. Spread it in a triangle in the same way as on the other side.
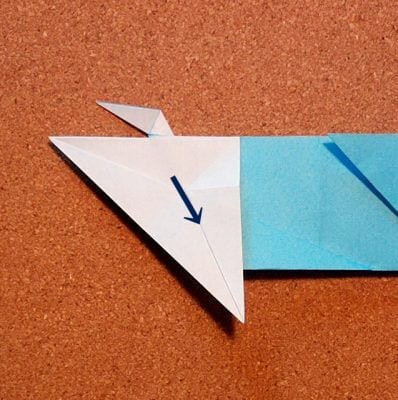
STEP 15. Refold the triangle as shown in the picture.

STEP 16. Fold the folded lower left corner along the upper side.
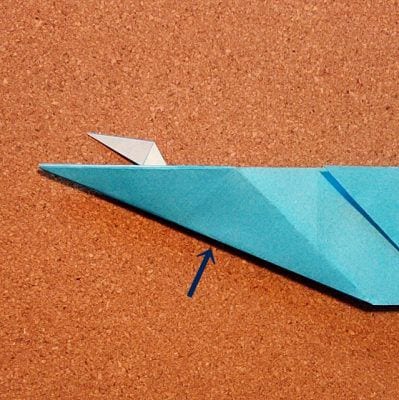
STEP 17. Turn it over from left to right, pull out the inner corner of the folded part, twist it backward, and fold it so that it is perpendicular to the upper side as shown in the photo.
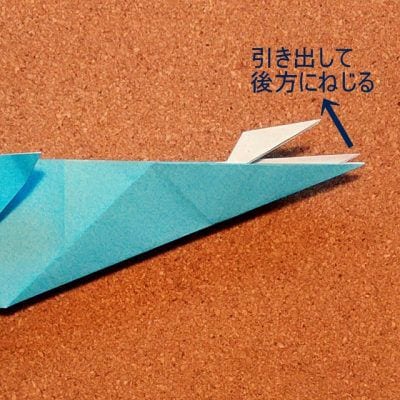

STEP 18. Twist the corner folded at a right angle to the far right and fold it.
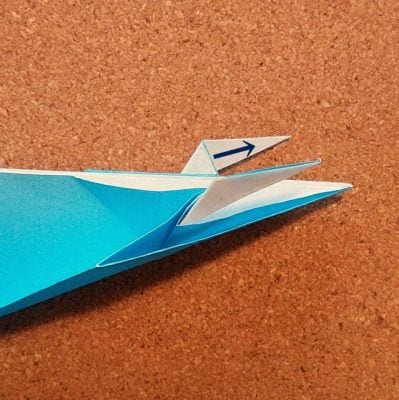
STEP 19. Open the torso and turn it over with the acute-angled side facing up.
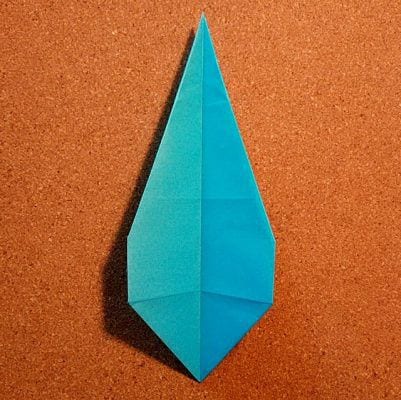
STEP 20. Fold the lower left and right corners along the center line.
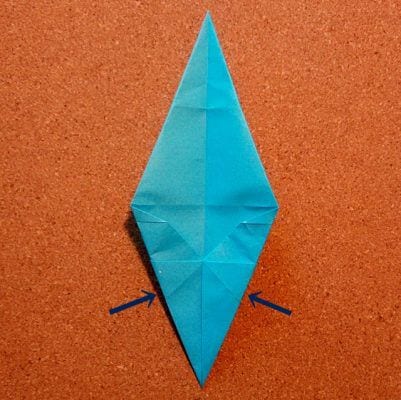
STEP 21. Fold it so that the left side is on the right side.
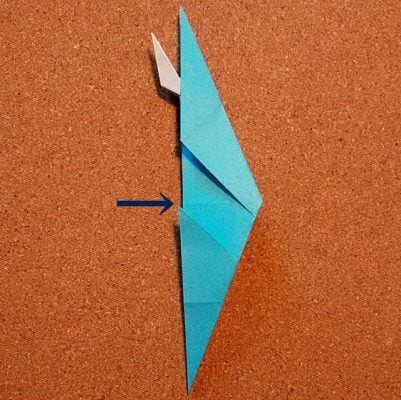
STEP 22. Fold the valley about 1 cm above the right corner .
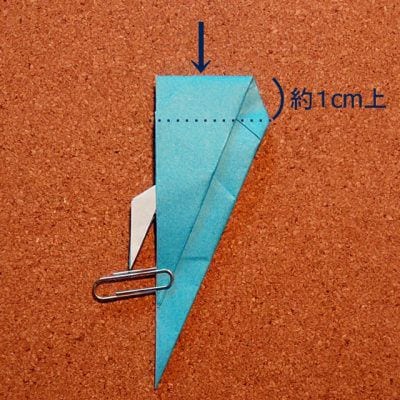
STEP 23. Fold it up around the apex of the right corner. * The size of the face of Triceratops is determined.
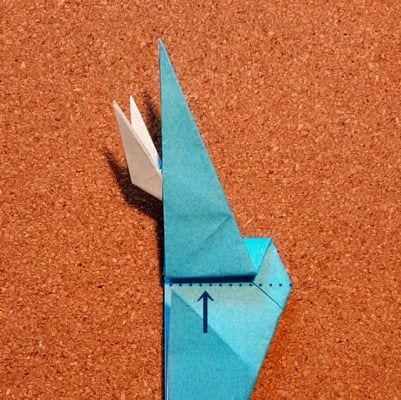
STEP 24. Open it so that it is on the surface.
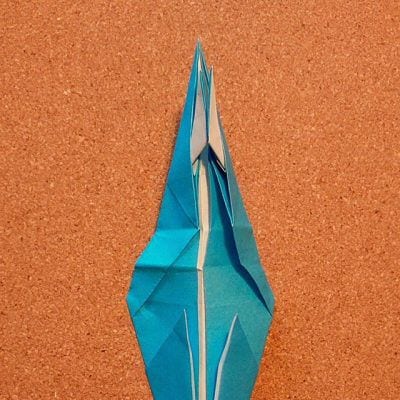
STEP 25. 1 mountain fold the one eye of the crease, 2 and valley fold the one eye.
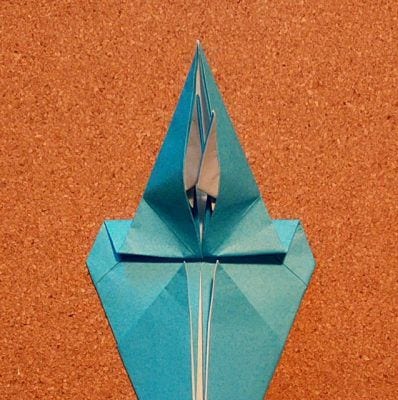
STEP 26. Fold it again and fold it down to the right corner (dotted line position) by pulling down the crease of the valley fold.
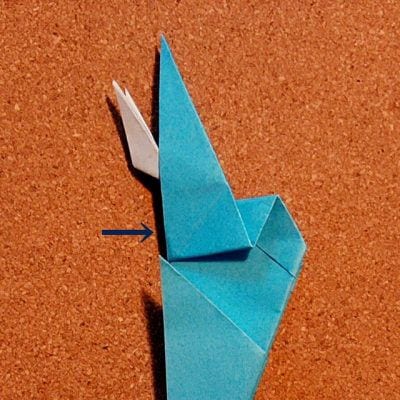
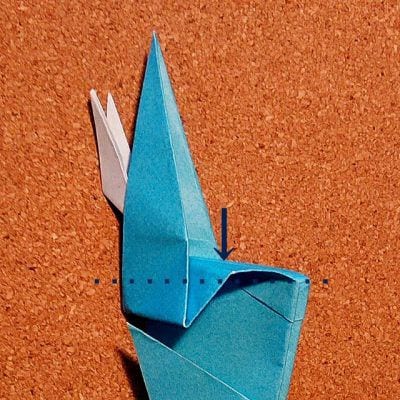
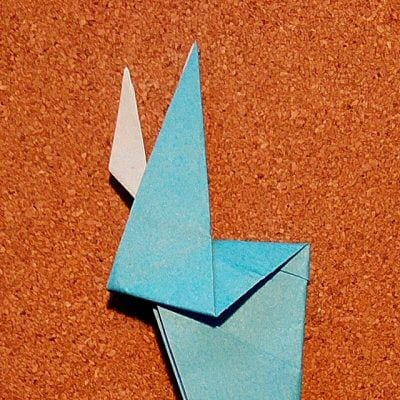
STEP 27. Open it on the back side and fold the left and right corners slightly inward. * Because it will be the stomach of Triceratops, fold it vertically.
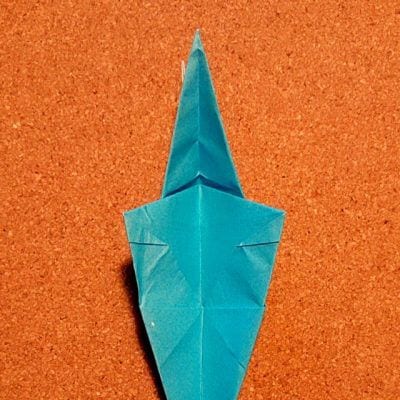
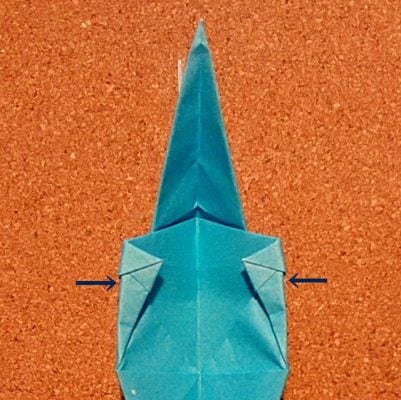
STEP 28. Open the left and right folded upper parts like a bag and fold it as shown in the photo to make the forefoot of Triceratops.
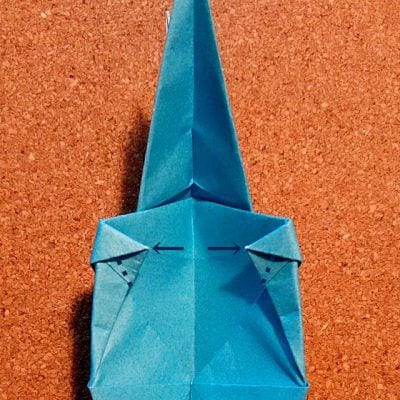
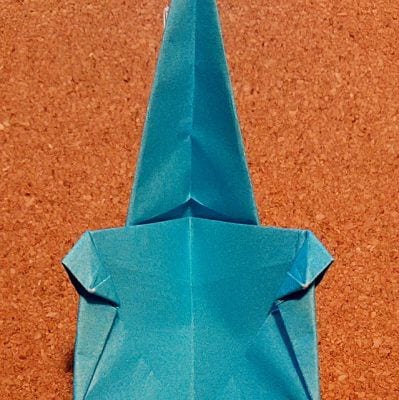
STEP 29. Fold it again.
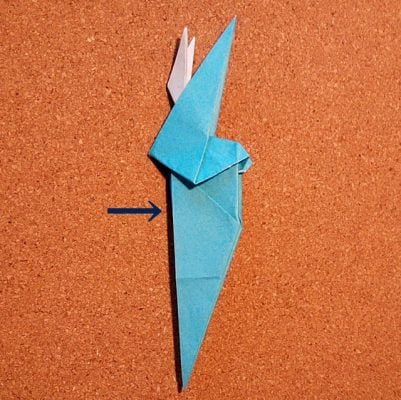
STEP 30. Starting from the center right corner, fold the bottom corner to the left.
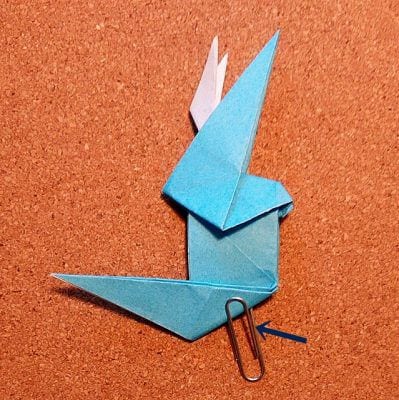
STEP 31. As shown in the photo, fold it further downward from the half position as the starting point.

STEP 32. Open the torso, pinch the tail, and push it upward along the crease. * Please note that if you use too much force, your back will tear.
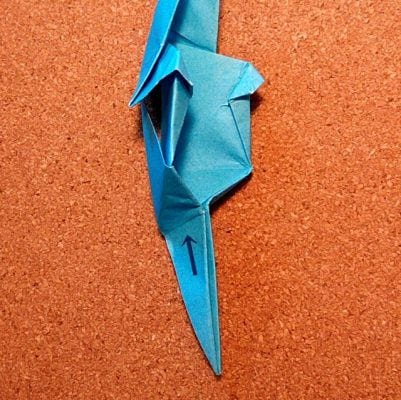
STEP 33. Adjust the angle of the tail so that it does not come out of the dotted line at the position of the forefoot.
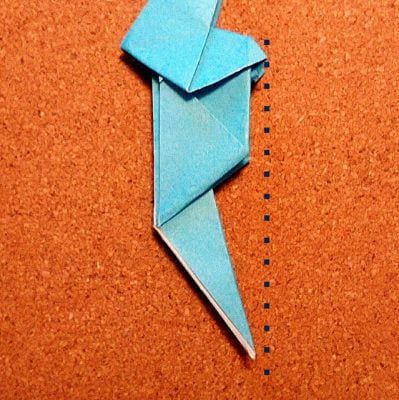
STEP 34. Place it so that it faces the left side.
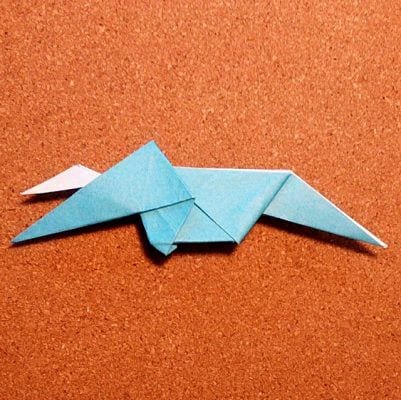
STEP 35. As shown in the photo, fold the triangular part on the right side of the torso downward to make the hind legs.
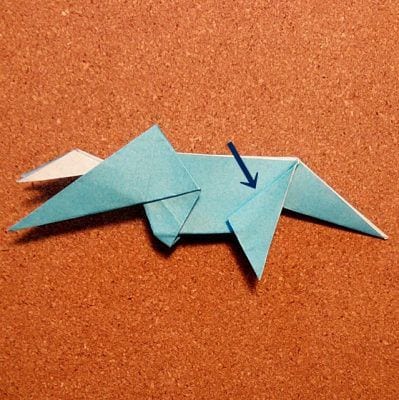
STEP 36. Turn it over so that it faces the right side, and fold the other side in the same way.
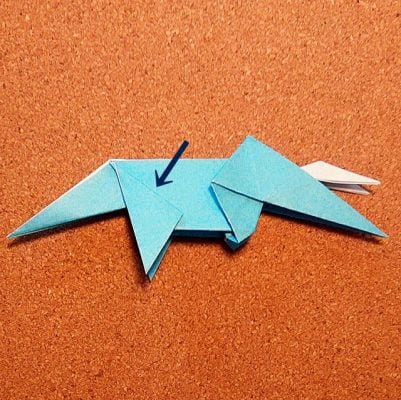
STEP 37. Fold the hind legs inward so that they are about the same length as the front legs.
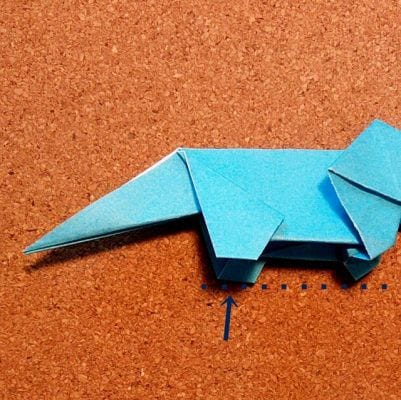
STEP 38. Divide the rightmost corner inward and fold it. * Fold it to a length that does not extend beyond the dotted line.
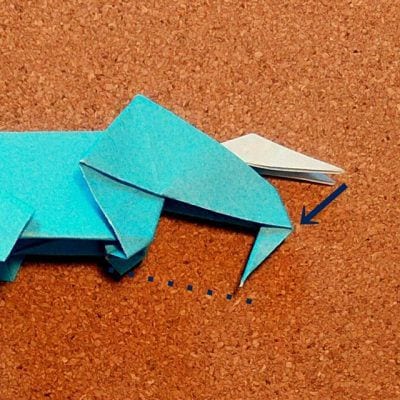
STEP 39. Fold the half-folded corner upward to make a tsuno.
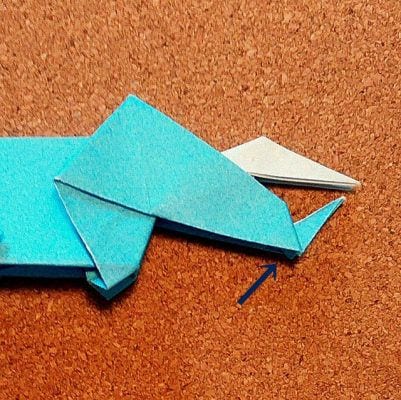
STEP 40. Once the triceratops is rounded and trimmed, the triceratops is complete!
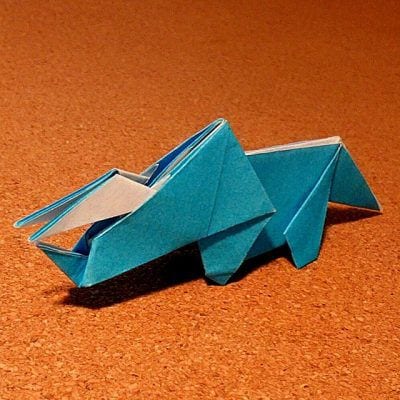
How did your triceratops turn out?
It's not that difficult once you fold it and get used to it, but I had a hard time when I first fold it;
There are some complexities of legs and head that are peculiar to animal systems, but it may be difficult to remember because there are many places where the torso is folded in layers.