Origami Rabbit Face
Few origami projects are as instantly rewarding as a bunny face — and this one is about as friendly as it gets. With just six folds and a marker, you can turn a plain square into a cute rabbit that kids will happily decorate themselves.
It’s a wonderful first project for little hands because there’s no cutting and no tricky techniques, just folding along dotted lines and following the arrows. In a few minutes you’ll have a whole warren of bunnies for cards, lunch-box notes, or a spring-themed garland.
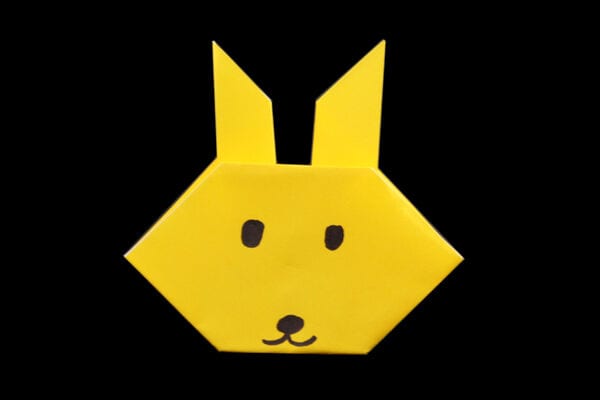
The origami rabbit face is great for kids. It is traditional and simple. No scissors are needed and no cutting is involved — just plain folding of paper.
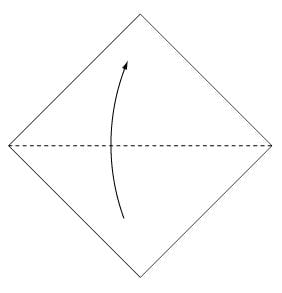
Step 1
Fold the paper along the dotted line, following the direction of the arrow.
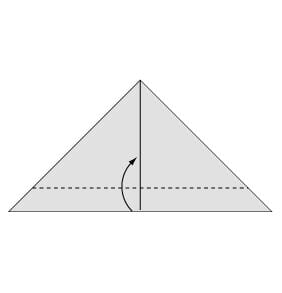
Step 2
Fold the paper along the dotted line, following the direction of the arrow.
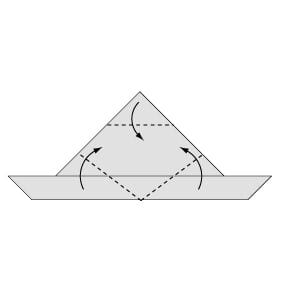
Step 3
Fold the paper along the dotted line, following the direction of the arrow.
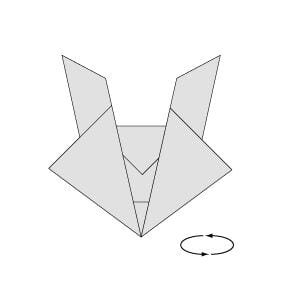
Step 4
Turn the paper over.
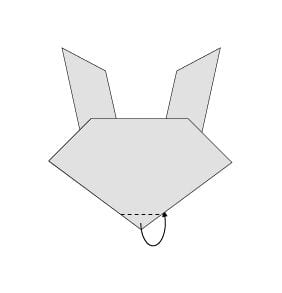
Step 5
Fold backward along the dotted line.
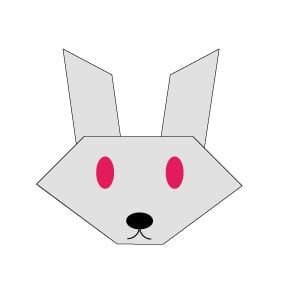
Step 6
Draw the eyes and a nose with a marker.
Complete.