How to Fold a Closed Square Origami Box (Step-by-Step)
There is a particular kind of quiet satisfaction in folding a box that holds itself together with nothing but paper - no glue, no tape, no lid to lose. The closed square origami box is exactly that: one square sheet that, through a careful lattice of creases, becomes a tidy little cube with walls that lock shut on their own.
This is not a first-project fold. It starts from a 4x4 matrix of creases and leans on one move that rewards a careful hand - the squash fold, which opens each corner into a wall. After that, the same small sequence of folds repeats around the four sides until the walls stand up and the last flaps tuck away to close the box.
Use it for the small things that deserve a small container: a ring, a few candies, a tiny note. Patterned paper hides the creases and makes the finished box look bought rather than folded, which is half the fun of giving one away.
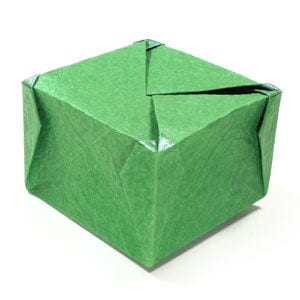
This page is for anyone who wants clear instructions for folding a closed square origami box.
This origami box starts from a 4x4 matrix base. The one special folding technique you need to know for this model is the squash fold.
Before working on this model, you need to know what a valley fold and a mountain fold are. Once you know those two techniques, you will have no trouble making the box.
If you are ready, then let's get started.
You may use any kind of paper to fold the origami box (*it is easier if the front and back of the paper are slightly different, whether in texture or color).
Make sure the paper you use is a square (all sides equal and all angles 90 degrees). The sheet I am using here is 15 cm x 15 cm.
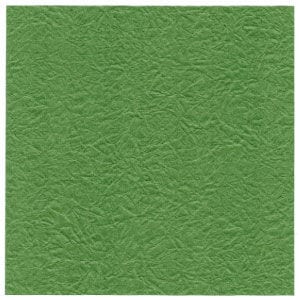
This is the front side of the paper, which will become the interior of the box.
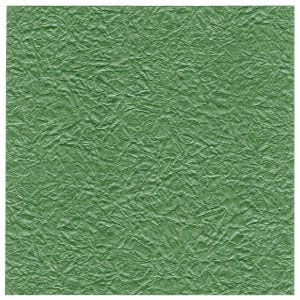
This is the back side of the paper, which will become the exterior of the box.
STEP 1.
Start with a square paper, front side facing up. Prepare to mountain-fold it in half horizontally, then unfold.
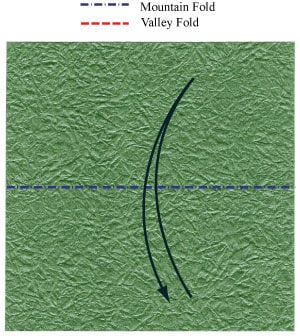
STEP 2.
Mountain-fold in half horizontally, then unfold. Prepare to mountain-fold in half vertically, then unfold.
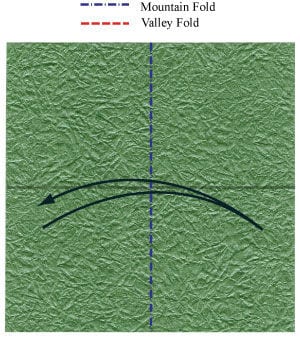
STEP 3.
Mountain-fold in half vertically, then unfold. Prepare to apply a horizontal gate fold, then unfold.
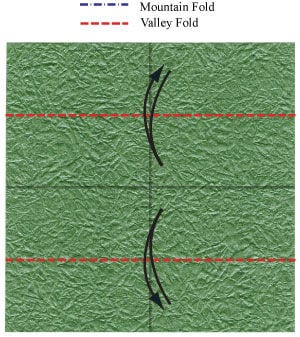
STEP 4.
Apply the horizontal gate fold from step 3, then unfold. Prepare to apply a vertical gate fold, then unfold.
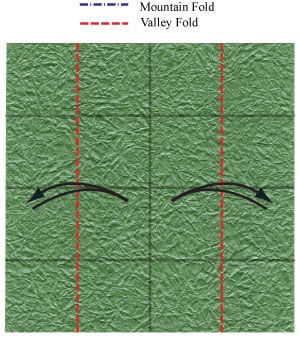
STEP 5.
Apply the vertical gate fold from step 4, then unfold. You have now completed the 4x4 matrix base.
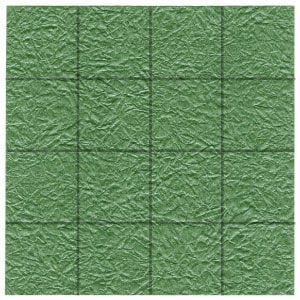
STEP 6.
Prepare to apply four valley folds, then unfold.
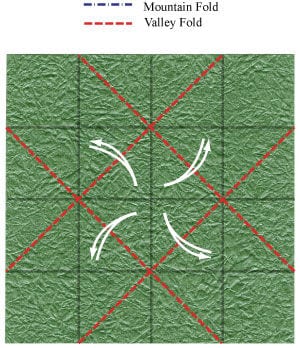
STEP 7.
Apply the four valley folds from step 6, then unfold. Prepare to apply a horizontal valley fold.
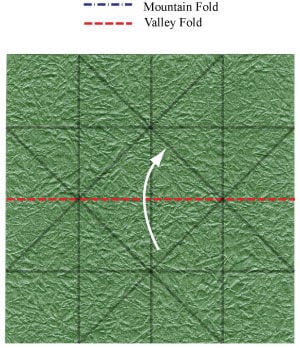
STEP 8.
Apply the horizontal valley fold from step 7. Prepare to apply two valley folds, then unfold.
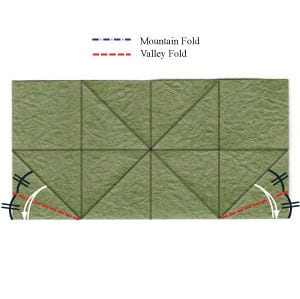
STEP 9.
Apply the two valley folds from step 8, then unfold. Prepare to apply two mountain folds, then unfold.
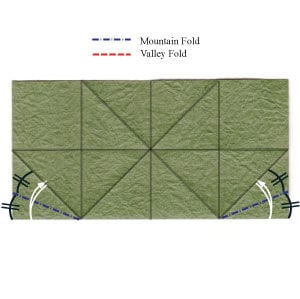
STEP 10.
Apply the two mountain folds from step 9, then unfold. Prepare to open the paper.
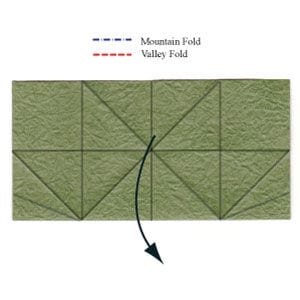
STEP 11.
Open the paper. Prepare to rotate the paper by 90 degrees.
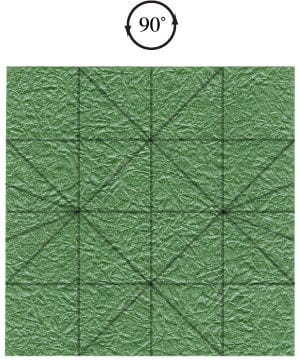
STEP 12.
Rotate the paper by 90 degrees. Prepare to apply a horizontal valley fold.
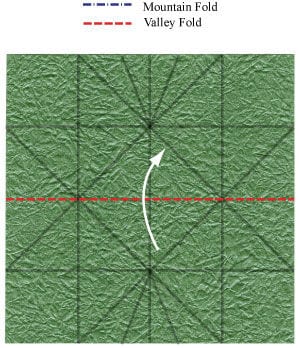
STEP 13.
Apply the horizontal valley fold from step 12. Prepare to apply two valley folds, then unfold.
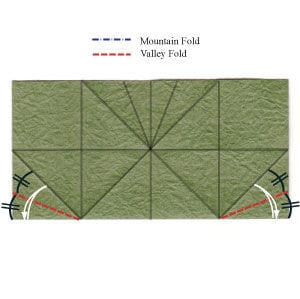
STEP 14.
Apply the two valley folds from step 13, then unfold. Prepare to apply two mountain folds, then unfold.
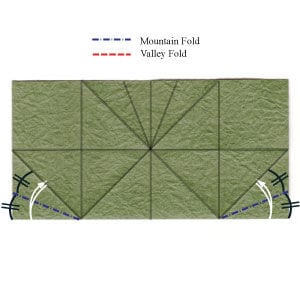
STEP 15.
Apply the two mountain folds from step 14, then unfold. Prepare to open the paper.
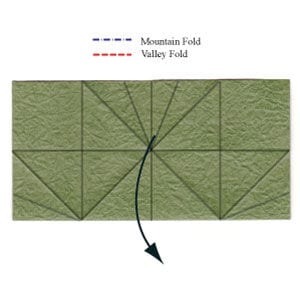
STEP 16.
Open the paper. Make sure your crease lines match those shown on the left.
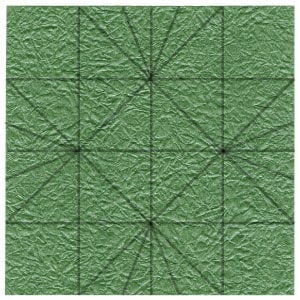
STEP 17.
Prepare to apply four squash folds.
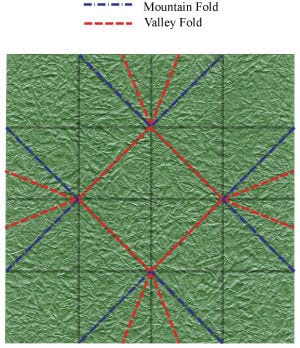
STEP 18.
Start applying the four squash folds from step 17.
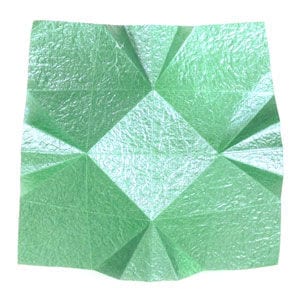
STEP 19.
Continue applying the four squash folds from step 17.
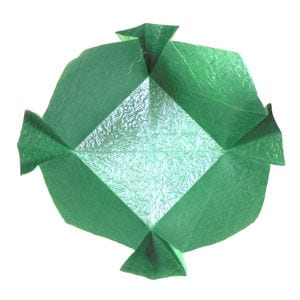
STEP 20.
Complete the four squash folds from step 17. Prepare to rotate the box model by 90 degrees.
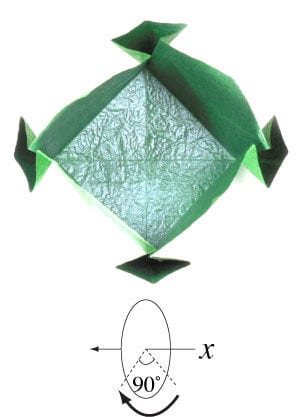
STEP 21.
Rotate the box model by 90 degrees. Prepare to apply two mountain folds.
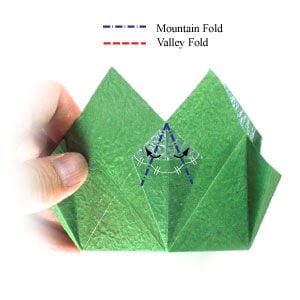
STEP 22.
Apply the two mountain folds from step 21. Prepare to concentrate on the elliptical region.
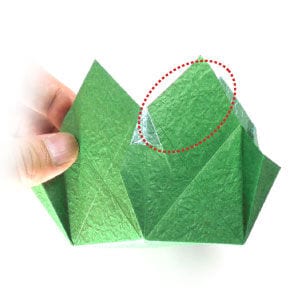
STEP 23.
Let's work on the upper right side. Prepare to apply a mountain fold.
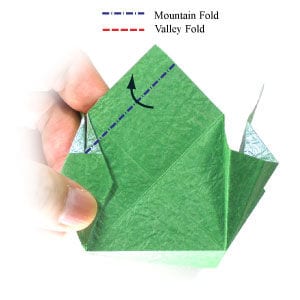
STEP 24.
Apply the mountain fold from step 23. Prepare to rotate the origami box model by 90 degrees.
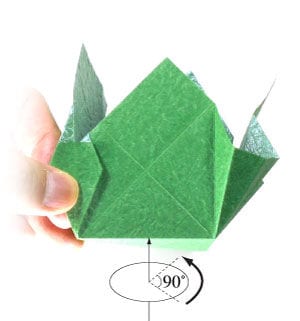
STEP 25.
Rotate the origami box model by 90 degrees. Prepare to repeat steps 21 to 25 three more times.
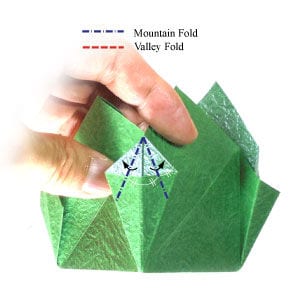
STEP 26.
Repeat steps 21 to 25 three more times. Prepare to apply a horizontal valley fold.
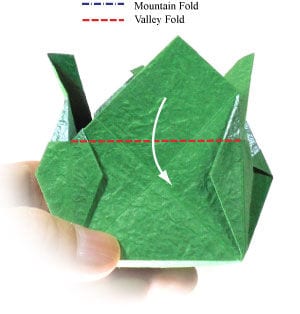
STEP 27.
Apply the horizontal valley fold from step 26. Prepare to rotate the origami box model by 90 degrees.
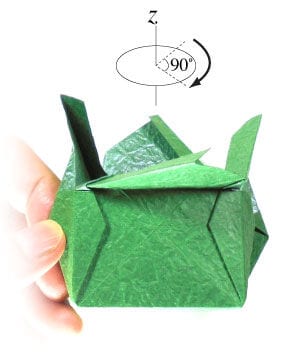
STEP 28.
Rotate the origami box model by 90 degrees. Prepare to repeat steps 26 to 28 three more times.
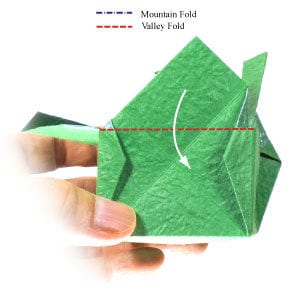
STEP 29.
Repeat steps 26 to 28 three more times. Prepare to rotate the origami box model by 90 degrees.
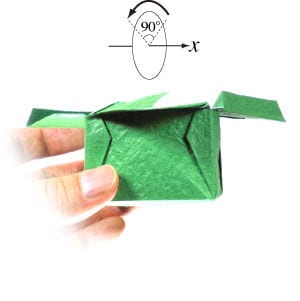
STEP 30.
Rotate the origami box model by 90 degrees. Prepare to apply the first valley fold.
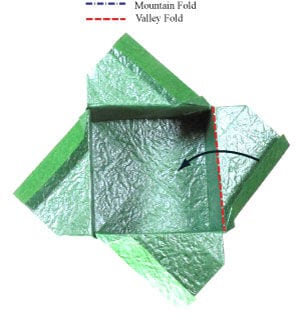
STEP 31.
Apply the first valley fold from step 30. Prepare to apply the second valley fold.
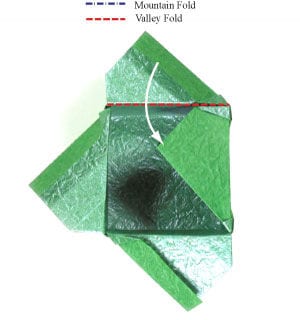
STEP 32.
Apply the second valley fold from step 31. Prepare to apply the third valley fold.
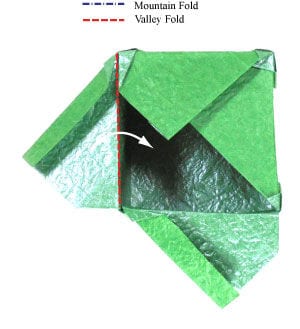
STEP 33.
Apply the third valley fold from step 32. Prepare to apply the fourth valley fold.
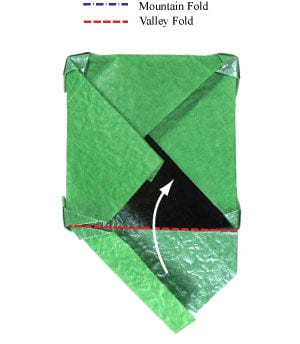
STEP 34.
Apply the fourth valley fold from step 33. Prepare to tuck layer 1 under layer 2.
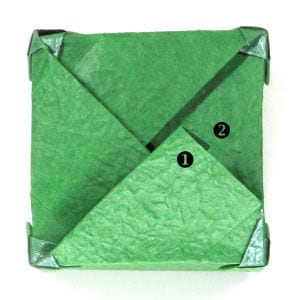
STEP 35.
Start tucking layer 1 under layer 2, following step 34.
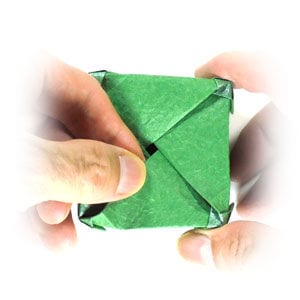
STEP 36.
Finish tucking layer 1 under layer 2, following step 34.
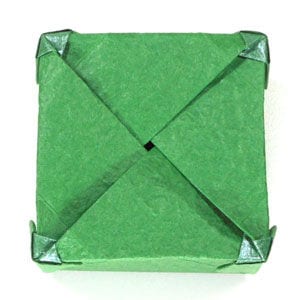
STEP 37.
Congratulations! You have just completed a closed square origami box.