How to Fold an Origami Hiiragi (Holly Leaf)
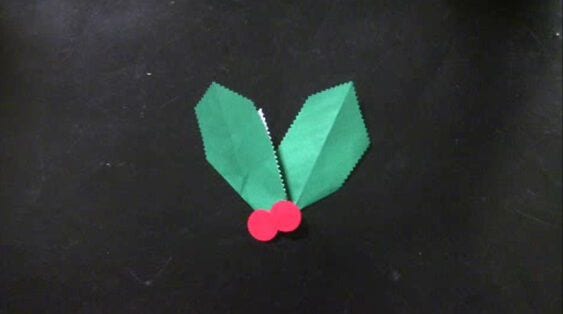
Hiiragi is the holly that shows up all over Japanese New Year decorations - those glossy, spiky-edged leaves tucked into door arrangements to welcome the season and keep bad luck out. This little origami version captures that shape in a single square, and once you know the moves you can crank out a pile of them in no time.
It is a gentle, almost meditative fold: a diagonal crease, one corner tucked to the center, then a neat alignment of two colored guide lines before the two pointed leaves take shape. Nothing tricky, nothing that needs perfect precision, so it is a friendly one to sit down with on a quiet afternoon.
Dress each leaf up with a dab of red for a berry and a quick snip with pinking shears, and a handful of them linked into a ring becomes a tiny wreath. Make them in greens of every shade and you have a bit of evergreen cheer that never drops its leaves.
How to fold
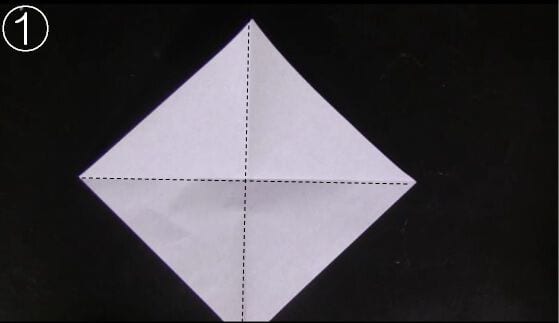
STEP 1. Make a crease along the diagonal.
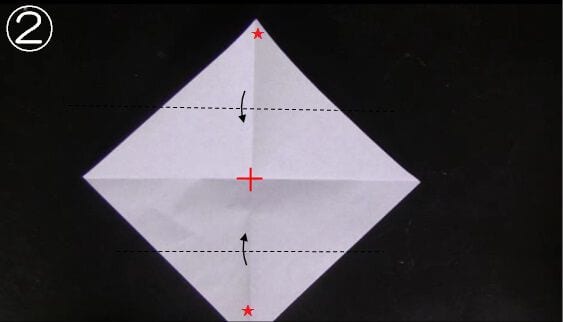
STEP 2. Fold the marked corner down so that it meets the center.
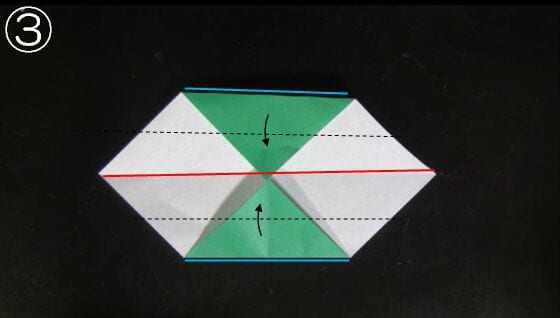
STEP 3. Match the blue line up with the red line, then fold.
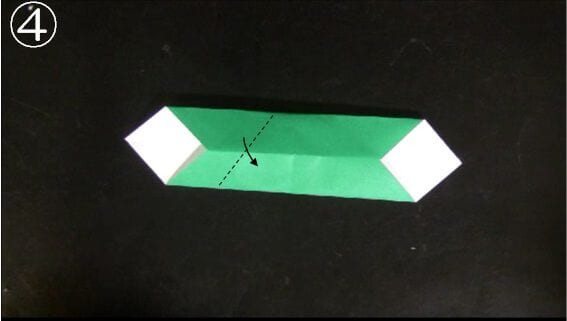
STEP 4. Fold along the dotted line.
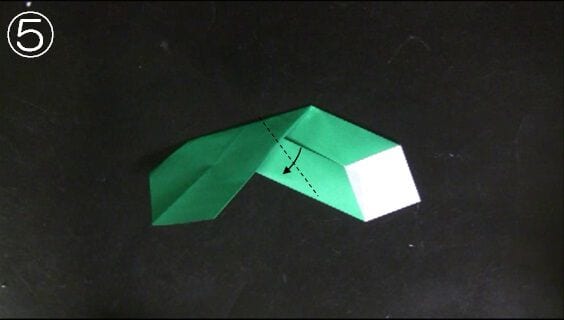
STEP 5. Fold along the dotted line.
STEP 6. Your origami hiiragi is complete.

Tips for folding
In steps 4 and 5, take care not to let the two leaves splay open too far.
The whole model comes together in just a few minutes.
On its own it looks a little plain, so add a small red sticker as a berry for a pop of color.
Cut around the leaf with pinking shears to give it the jagged edge of a holly leaf.
It looks far more striking all at once. Make a handful and join them into a ring, and you can even build a holly wreath.