How to Fold an Origami Tuxedo (Easy Step-by-Step)
A paper tuxedo sounds like a party trick, and honestly, it kind of is. With one square of paper and a handful of folds you get a tiny formal jacket - lapels and all - that looks sharp enough to pin onto a card or dress up a paper doll.
The fold is friendly from the first crease. Most of it is the same few moves repeated: fold the paper in half, tuck the edges behind, bring the sides in, then open the corners out along the diagonals. Nothing here needs a steady hand or a complicated base, so it is a good one to share with a beginner.
Once you have made one, you will want to make ten. Black paper gives you the classic evening look, but a stack of them in bright colors starts to feel like a tiny paper wardrobe waiting for a celebration.
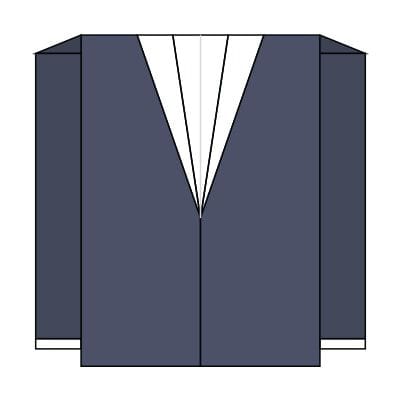
These instructions will show you how to make an easy origami tuxedo. If you have never folded anything before, we suggest you take a quick look at our Beginner’s Guide, which introduces all the basic folds and bases.

STEP 1. Fold the paper in half both ways and unfold it each time.
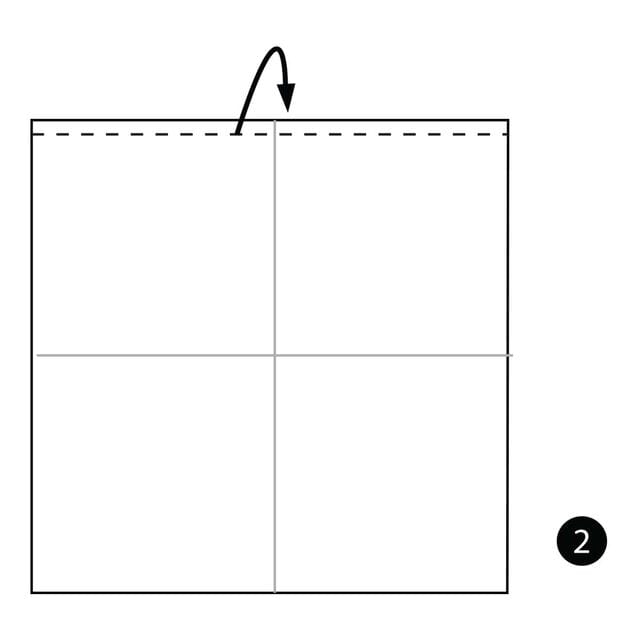
STEP 2. Fold the top edge behind along the dotted line.
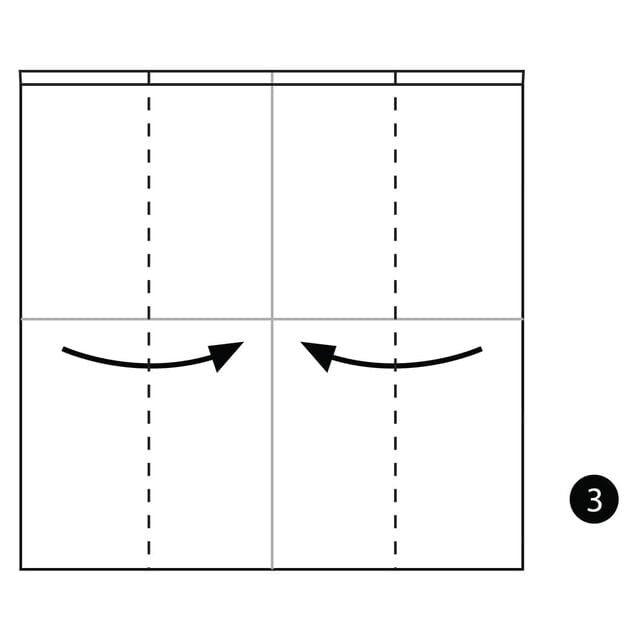
STEP 3. Fold both sides in along the dotted lines.
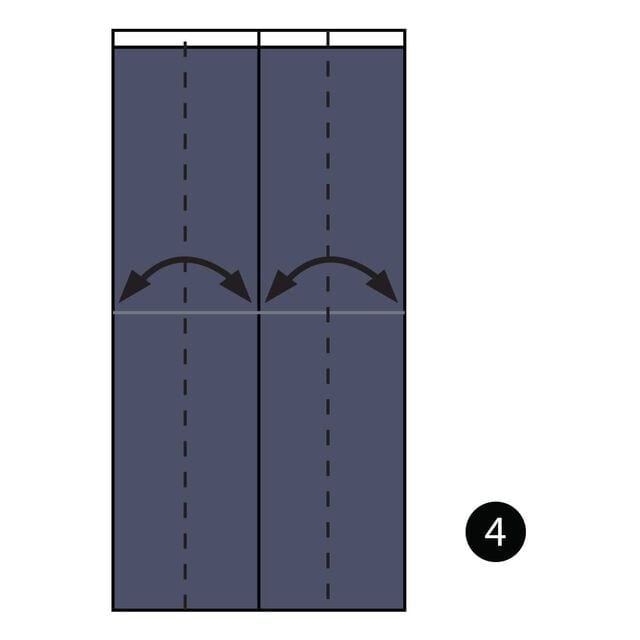
STEP 4. Fold the top layers of paper out along the dotted lines, then unfold.
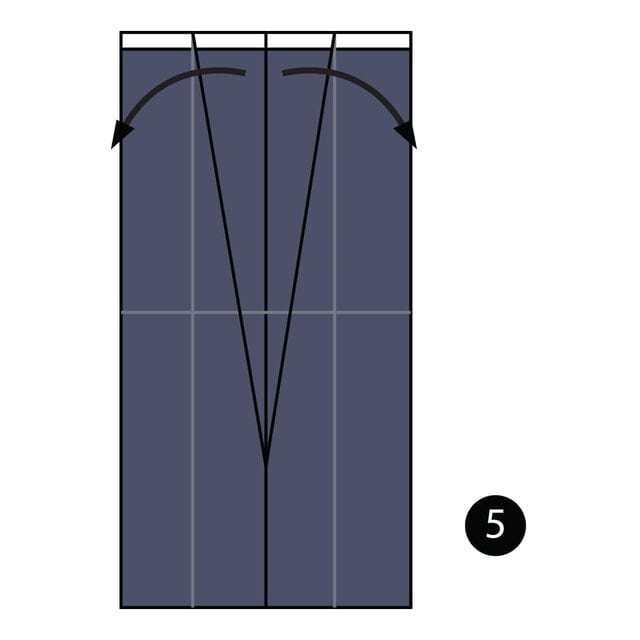
STEP 5. Fold the paper out along the diagonal lines.
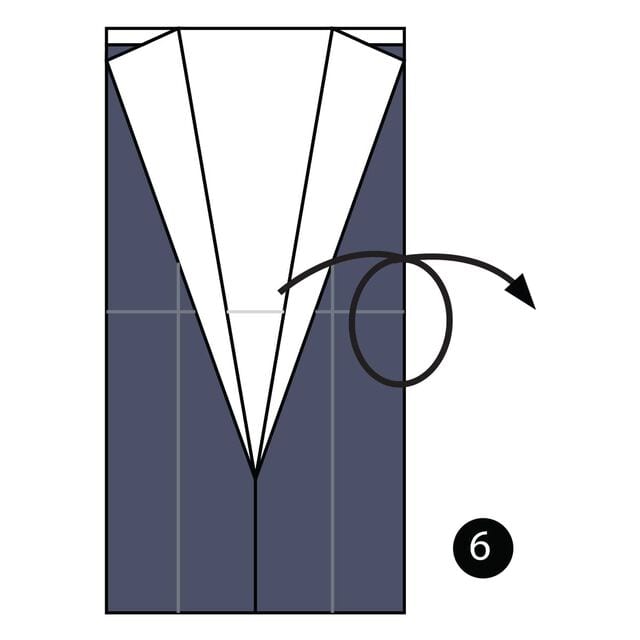
STEP 6. Turn the paper over.
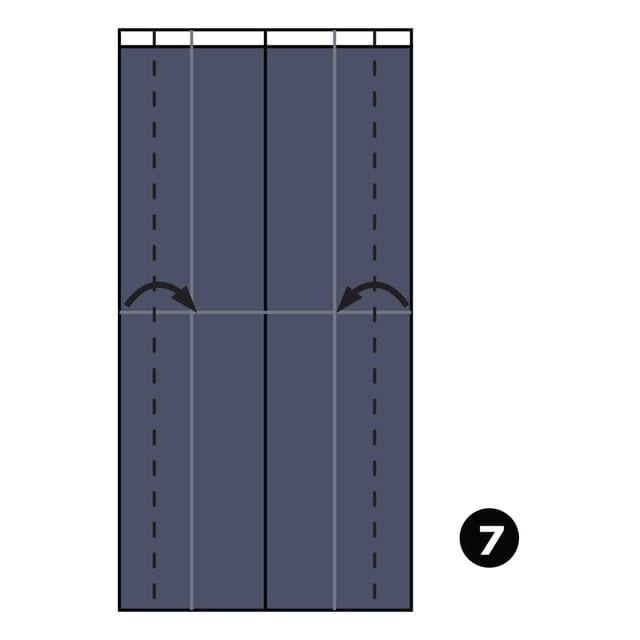
STEP 7. Fold both sides in along the dotted lines.
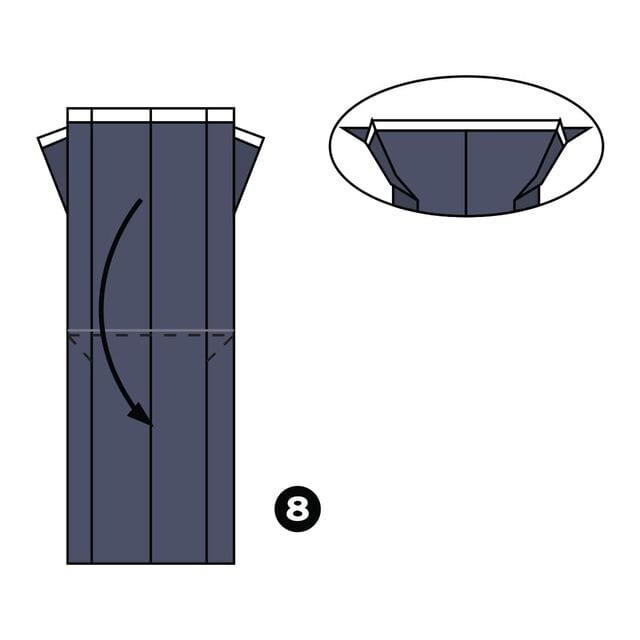
STEP 8. Fold the paper out along the diagonal lines, then down along the horizontal line.
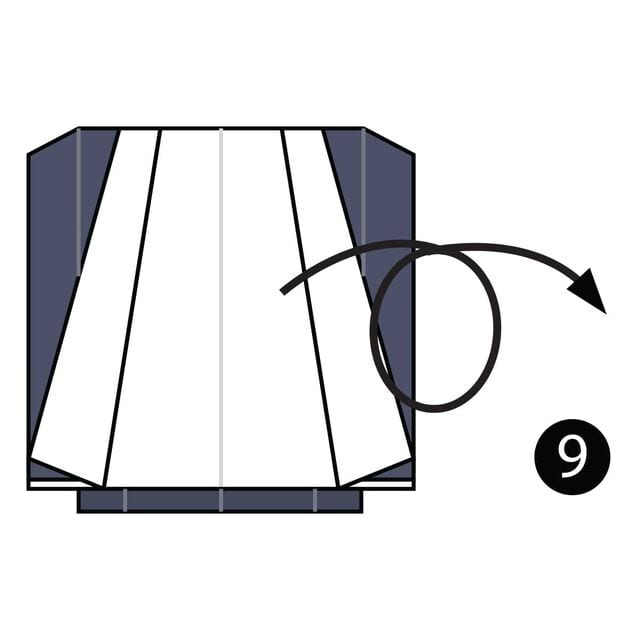
STEP 9. Turn the paper over.
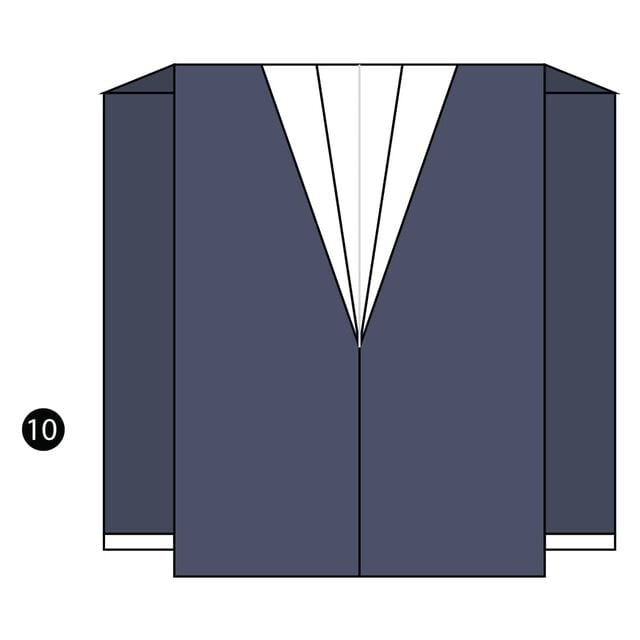
The complete origami tuxedo.